photo HEADER2_zpsztxreyz7.png

Tuesday, September 30, 2014

Revealing the most finished room in our house!!!


{please ignore the sheet hanging out}

Hello!  We have a normal looking bedroom!!!  Can you tell that I am pretty pumped?? I know we have a long way to go, but look how far we have come!


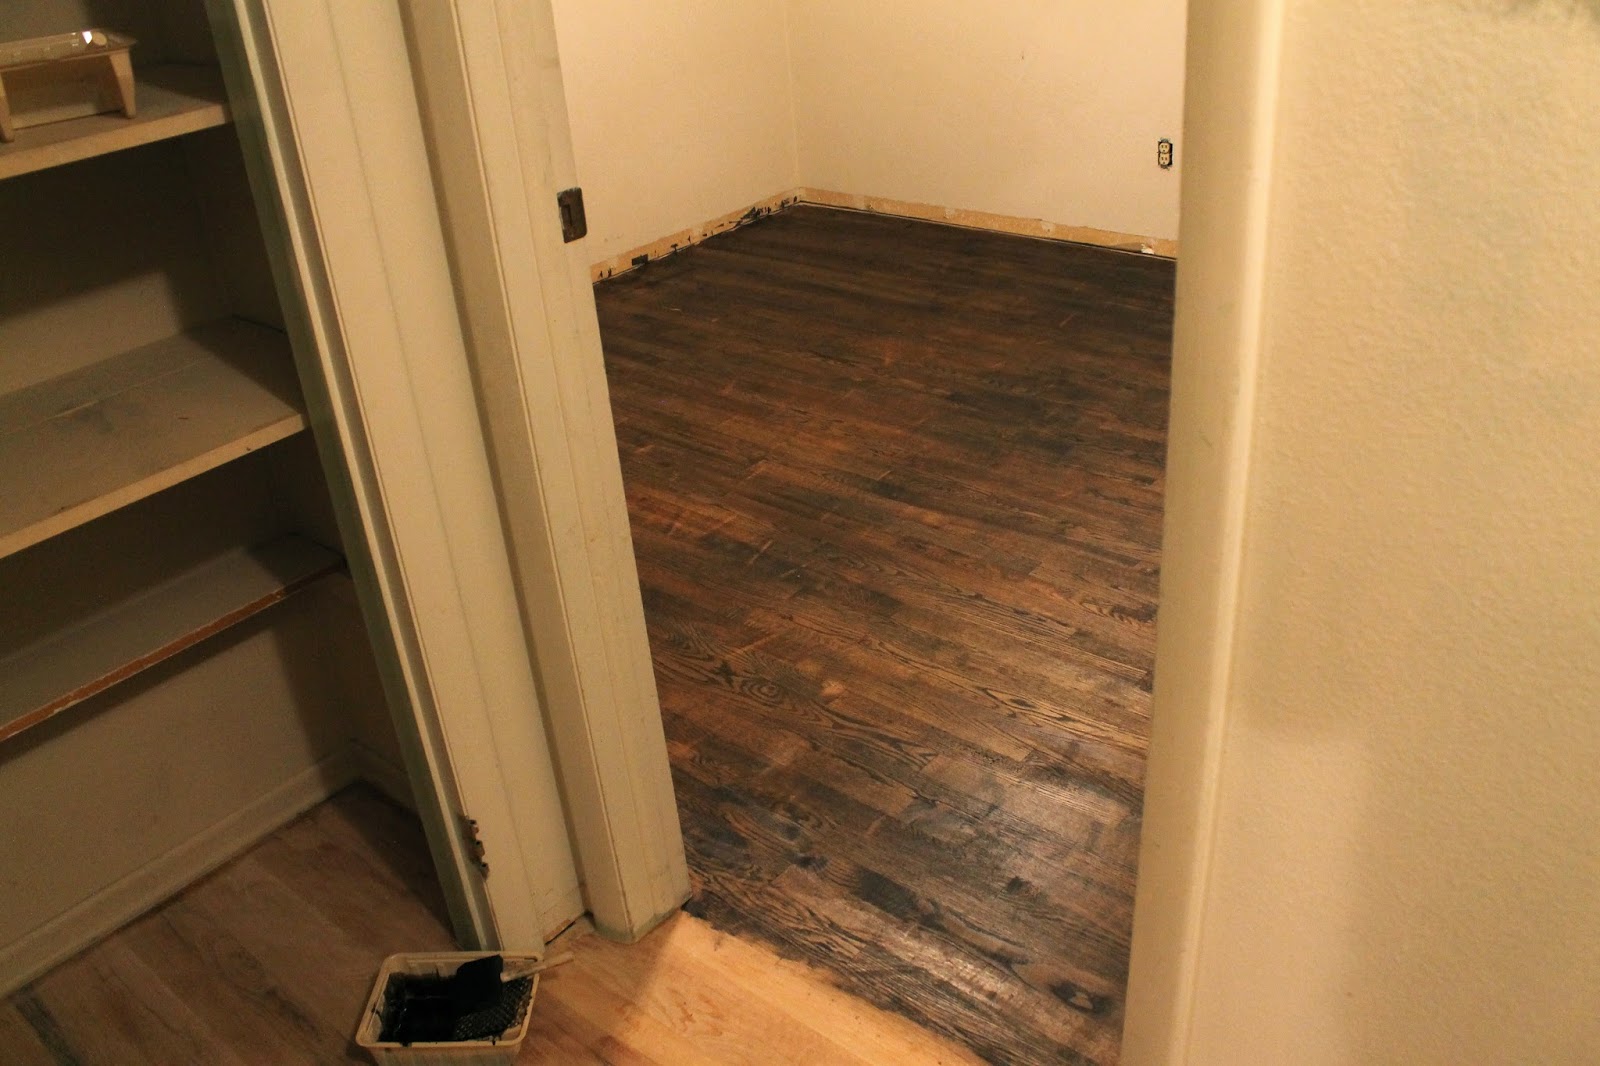
Before I get to the list of things I still want to do I will cover what we have done.  Floors were sanded, stained and sealed.  Ceiling was repainted.  Tall Tan Man {aka stud muffin, aka Tim the Tool Man Taylor} repaired a massive hole in the wall.  I am not sure why they thought covering the hole left by the AC wall unit with wood was a good idea. 


Can you tell where the patch is?


Neither can I!  :)  He did so good.  

Up next is getting a ceiling fan that is not adorned with flowers.  Ceiling fans are interesting creatures. So far I haven't met one I really like...  We are trying to stay to a budget, because ultimately {maybe 3-5 years} we want to sell this house to make some money.  Therefore, we will not be spending $200+ on a ceiling fan.  If you know of any beautiful and cheap ceiling fans please let me know!!!

  We also need to install some BLINDS!  I am not going to lie...I got dressed this morning sitting on the floor {not an easy or pleasant task}.  We also desperately need a rug because the dark stained wood look is overwhelming.


Here is our to do list {yes, I put items on the list we have already done so I could check them off}:
  • Remove Carpet & Redo Wood Floors
  • Paint Ceiling
  • Fix AC Hole in the Wall
  • Paint Walls
  • Update Ceiling Fan
  • Put Up Blinds
  • Put Up Curtains
  • Update Closet & Bathroom Doors
  • Hang Art/Mirror
  • Get an Area Rug
  • Update Window Sills
  • Install Baseboards
I will share more projects as we get them done!  Well, maybe not everything.   Do you want to see our new toilet seats? They are totally awesome!  I'm kidding.  Well, they are the soft close ones.  I am losing it.  Bye Bye :)

{LJ}

Linking Up to:
Blissful Bee

Monday, September 22, 2014

A little less conversation and...

a little more action!

Hi y'all!  Sorry for my absence, but we have been BUSY!  I wanted to stop in today to share some of our house "progress!"  It seems like it is going to be little while before our house is considered livable by most people.  We have been working our tails off and little by little we are making progress.  After we {finished our floors} we started in our kitchen.  


The double oven has been removed since that picture.


We didn't want to totally destroy our kitchen this early in the process, but we bought all our appliances and needed to make some room.  The first thing we did was remove the wallpaper overhang {what is that called?} above the cabinets.  


The previous owners were super fond of molly bolts/nails/screws.  Needless to say, we now have some beautiful holes in the ceiling.  We also removed the hood above the stove.  I didn't totally hate the hood, but Tall Tan Man could not see across the kitchen {I call him TALL tan man for a reason :) }.   


 Moving boxes can be used in multiple ways.  


Our kitchen looks so much BIGGER now!  I love it!  Well, I should say I love the progress we have made. We have also spackled all of holes in the walls.  Again, the previous owner was a little screw/nail happy.  


Next up was painting the ceiling.  We really wanted to get this done before moving our furniture in...


We did two coats on the ceiling and it was so much fun! ;) Our move on Saturday was pretty uneventful except for when I fell out of the back of the truck.  I would show you my bruise, but it is not in the best location for a picture...


We have started painting but I will have to share more on that later.  I think I have to actually cook dinner now that we have moved...


Thanks for stopping by to see our crazy house!  I hope you had a wonderful Monday!  

{LJ}


Sunday, September 14, 2014

Refinishing Hard Wood Floors {Part 3}


Wooo hooo!  FLOORS ARE FINISHED!


As you can see the staining process started out fabulously.  FYI home depot bags are not strong enough to hold 3 cans of stain {quart size}.  I had to run to the closest paint store to get paint thinner, and I was quiet embarrassed because my feet were covered in stain...  Thankfully, the rest of the process went *almost* seamlessly.  

We used two methods for staining our floors.  Both methods worked but one was much quicker. Before we started staining we did A LOT of sweeping and did a quick mopping.  Our mop was barely wet, and this helps open up the wood for the stain.  The next step was picking out a stain.


We chose Jacobean by Minwax.  I started out using plastic gloves,  foam brushes, plastic paint container, and old towels.  


 I worked with the grain and tried to let the stain sit for the same amount of time before wiping off the excess. 


Tall Tan Man thought this was going too slow, and decided to mop the stain on {$7 mop from walmart}.  Home depot has "mops" made for oil based stain and polyurethane.  We ended up using those mops for the polyurethane. 
 

He still wiped up excess stain which was the only slow part of the process.  After all the stain was down we waited 24 hours before we started applying the polyurethane.  


To apply the polyurethane we moved with the grain and did long even strokes to make sure there was no unwanted marks.  We allowed the floor to dry for 24 hours before we lightly sanded with 220 grit.  


I mopped the floors once or twice, but don't worry if your floors still appear to have dust on them.  They will look beautiful again, don't worry!


Cost Breakdown:

Step 1 & 2: $267
4 Cans Stain {one spilled}: $35
Brushes and Containers:  $15
4 Cans Polyurethane: $125
Mops: $18
220 Sand Paper{4}: $28 

Total: $488
 
Another piece of advice I have is not to drink red wine while staining...

 Wahhh...


The floors look great & I can't wait to move our furniture in next weekend!

{LJ}


Tuesday, September 9, 2014

Refinishing Hard Wood Floors {Part 2}


 Hi y'all!  Can I just say that updating our floors has been a TIME consuming project... I have a confession, I am an overly optimistic person {which I am actually thankful for most of the time}.  After reading a bunch of blogs on how to redo wood floors, I thought this process would be a walk in the park.  Then life happened...  We went out of town, Tall Tan Man had two golf tournaments, and our move date got moved up 3 weeks!!  Needless to say, the process has taken longer than I expected, but I am totally in love with our finished floors.  I love them so much that I would do this whole process again, I think.  :)

Now I am going to fill y'all in on how we sanded the floors, and this weekend I will reveal the finished product!  Here are some of the before shots of the floor with the old golden polyurethane on it. 


He is such a hottie. :)  We started this project on Sunday evening of Labor Day weekend after flying in from Nashville {yes, we are crazy}. We went straight to Home Depot from the airport to rent the floor sander, and sanded until 1 AM...sorry neighbors.  We wanted to make sure we took full advantage of the 24 hour rental in order to stay on budget.

 
TTM did most of the sanding.  He started with 36 grit sandpaper, moved with the grain, and overlaped as he went {pictured above}.  He also worked very slow and steady.  This is why I wasn't allowed to touch the sander.  I don't do anything very slow... The floor sander does not get to all the edges which is one major downside. After the 36 grit paper, he sanded the whole house again with 60 and 100 grit.  We got the sander returned with 20 minutes to spare! Booyah!


 We first tried to use our palm sander to get all the edges, and that was pretty awful/ineffective.  So we decided to keep our sanity and rent an edge sander. 


This sander was CRAZY POWERFUL.  It will throw you across the room if you are not careful.  We {i helped!} moved  nice and slow try to get all the polyurethane up.  We used 36 and 100 grit paper.  Yep, we got lazy and skipped using the 60 grit...  In the end we did have to finish with a palm sander in order to get the corners of the closets and rooms. 

Here is our cost breakdown so far:

Paint Stripper {from step 1}: $9
Floor Sander Rental: $65
Floor Sander Paper + Palm Sander Paper: $130
Floor Edge Sander Rental: $43
Floor Edge Sander Paper: $20

Total: $267


Phew, that was long...and intense...and all about sanding...I think I'll just go to bed now!  I can't wait to share the finished product with you!

{LJ}

Wednesday, September 3, 2014

Refinishing Hard Wood Floors {Part 1}


 Tall Tan Man and I have been hard at work on our house.  Our goal is to get the floors and the walls repaired/painted before we move in.  These are not the smallest of tasks we are figuring out.  Our floors were covered with awful blue, stained carpet.  We had a glimmer of hope there was wood under the carpet because our back bedroom was wood.

YAY!!!


Day One {3 hours}
This day was all about getting the carpet out and some of the floor padding up.  This is the one tool you will need:


  At first we were going to just use a box cutter, but one of my coworkers convinced me {and gave me} a carpet knife.  THANKS TONY!  Holy cow.  This is a must have.  It makes cutting the carpet easy easier.  We just start in one corner and cut our carpet in smaller strips to help with the disposal process.  

 Our bedroom had extra beautiful carpet :)   


 Day Two {5 hours} 

Getting the padding up was a slow and tedious process.  I guess I should actually say getting the padding up was easy but removing the staples was another story!  I just started on one side and began pulling the staples up one at a time.  I used a flat head screwdriver and pliers.  I looked online for a better way and could not find one.  This process is not difficult but it is just so slow…oh and don’t wear your favorite shorts because there is a good chance you will scoot your bum across a staple and ruin them.  Tall Tan Man used paint scraper to remove the staples.  We had a little different way of doing this and I wanted to share so you could keep your options open. :)


Can you see where the poofs of padding are?  That is where the staples are.  At this point you are at the mercy of how staple happy the carpet installer was.  I used the flat screwdriver to pry up the staple, and then if it didn’t come up all the way I would pull it up with the pliers.   

Was it worth it? 


I think so! 
Day Three{ish} {5 hrs}

The worst part of this whole beginning process was getting the plaster/glue/linoleum up.   

That stuff was the devil.  I started to scrape it off with a putty knife then I moved to using a garden hoe.  TTM tried wetting it down and scraping which helped.  Then he decided to use a paint stripper after we had about 90% off the plaster and it scraped off like a gem.  {you gotta be kidding me}.  Lesson learned! 


Well, if you follow me on {instagram} you know I will be back soon to talk about our experiences with the floor sander... Hooray for being a home owner! 


{LJ}

Related Posts Plugin for WordPress, Blogger...