photo HEADER2_zpsztxreyz7.png

Tuesday, February 28, 2017

What we learned from fixing up our home!


Wooo weee buying a fixer upper when you have lived in nothing but apartments, dorms, {and your parents house} comes with quite the learning curve.  Tall Tan Man and I have learned more than we probably wanted to!  Painted every surface of our house {staining the floor counts in my book}, tiled, caulked, fought, laughed, sanded, created a baby, and made some unforgettable memories.  These are some of the things that we have learned along the way...

1.  Understand that you will go to Home Depot 3 times in one day.  And you probably won't like it.

2.  Don't just buy things because you will need them at some point {unless they are on sale}.  One thing I learned from a Home Depot worker is that most of the items in their ads are not on sale but their normal prices.  In the beginning I would go to Home Depot for more paint and end up buying a light fixture or a toilet because we would eventually need them.  Then we would have a toilet in our front room for months...and months... Buy things when you need them.

3.  Getting rid of cabinets, paneling, and bath tubs can be expensive.  Since it took over 2 years to complete our remodel, buying a roll off dumpster wasn't feasible.  Habitat Restore will take your old stuff!  For free!!  We also took advantage of industrial size trash bags, our trash guys are the best!  Waste Management sells a Bagster {at Home Depot} which only cost $150 for the bag and removal.  It was pretty remarkable all that you can fit in one of those bags!

4.  Make a budget, then increase it by 30% and that will be a more accurate budget.  This is assuming you don't have any crazy unexpected costs and have some clue about remodeling costs

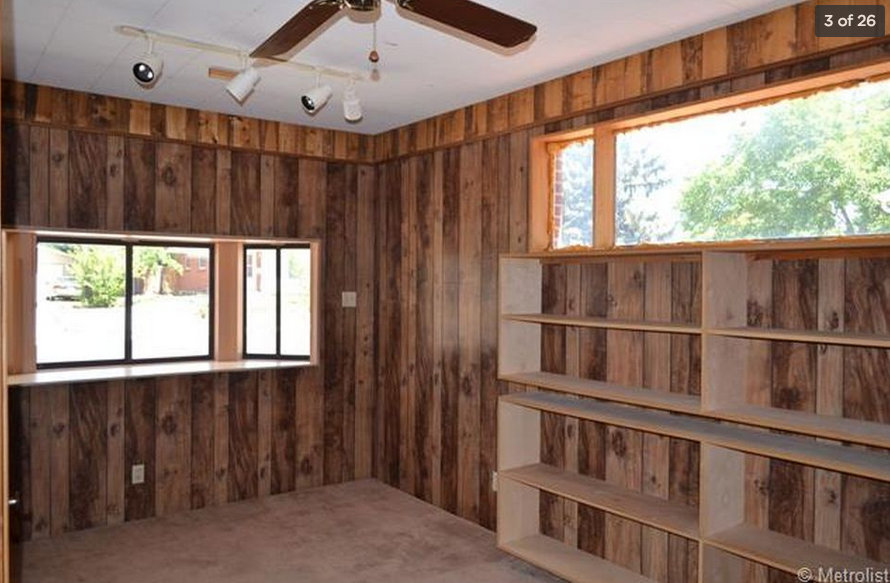
5.  Remodeling older houses isn't as simple as you would think...  Our home was built in 1962 which makes everything 55 years old...  We wanted new door handles, easy fix right?   Well, the ones at Home Depot wouldn't fit our doors.  It was either; buy new doors or spray paint the current handles.  I chose the latter.  The electrical system in our house was a little bit of a mess which made it harder to update lights and outlets.  We were lucky on our windows because the previous owner replaced all but two of them.  I know, what were they thinking, why not all!?  For a house of our size, new windows can cost anywhere from $11,000 - $30,000.  Which is nuts!

6.  Think about hiring a few projects out.  Living in a house that is being remodeled is tough.  In the beginning we would look around and all we could see were projects.  If you can afford it, consider hiring people to help.  I think this would of helped us not get burned out and maybe finish quicker than 2.5 years...

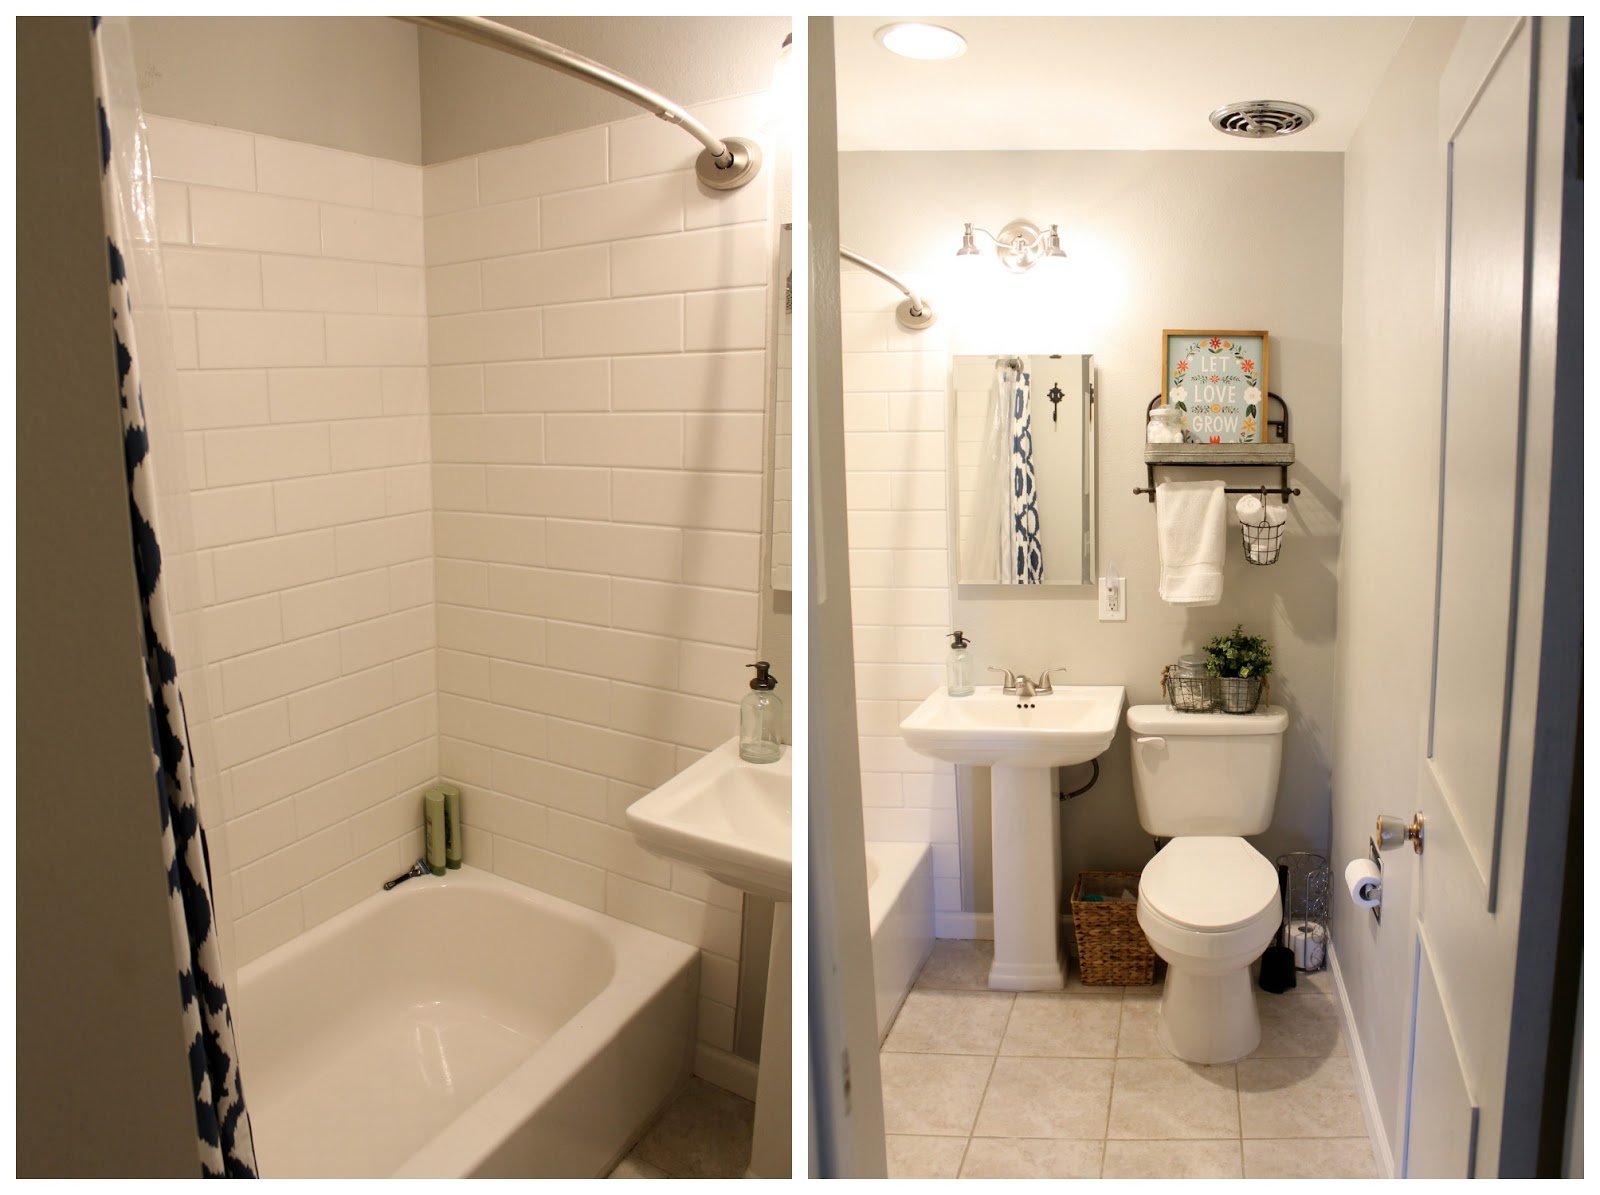
7.  Shop the clearance sections of Home Depot and Lowes EVERY time you go.   I know that I said not to buy things until you need them but this can save you mega bucks!  We purchased our bathroom vanity at 60% off.  Bath tub at 30% off.  Kitchen sink 10% off and kitchen faucet at 70% off!!!  The light we have in our hall bathroom actually rang up for $.01.  I'm not kidding.

8.  You are capable of doing almost all home projects on your own {but don't forget about number 6} Extend your sprinkler system, yep.  Install a vent hood, yep.  Move the gas line for the stove, done.  Move the water in a shower, yep{thank you shark bite!!!}.  Tall Tan Man is my hero!

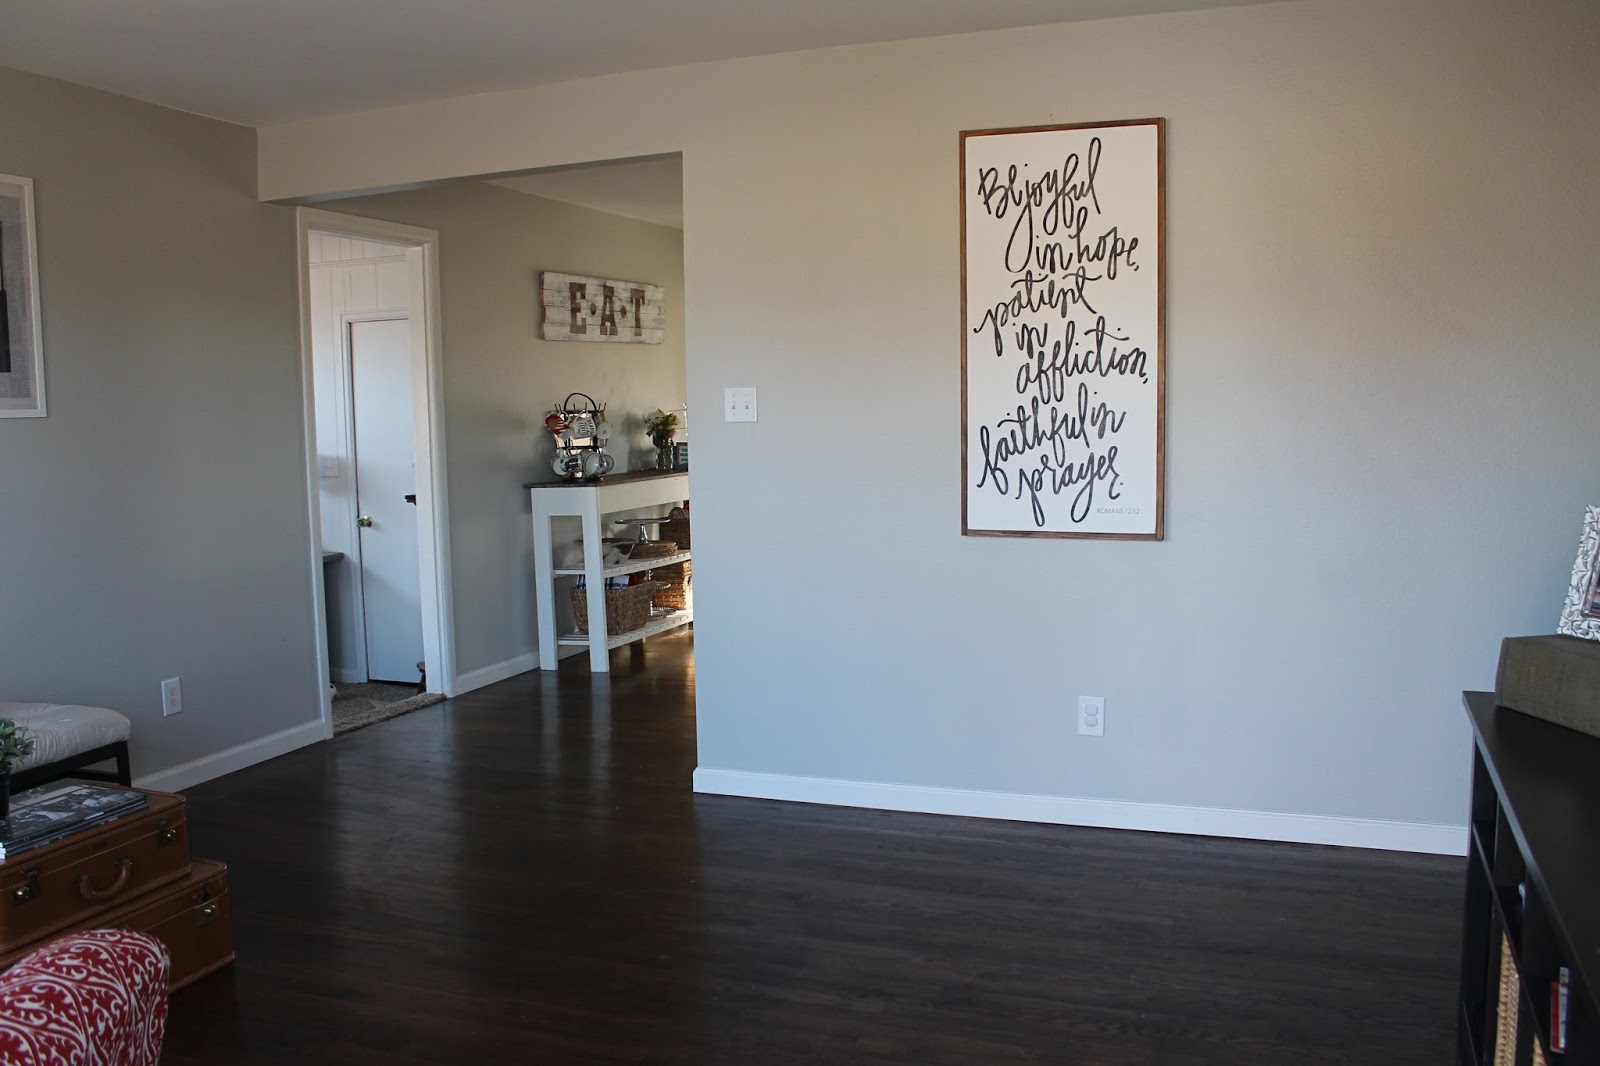
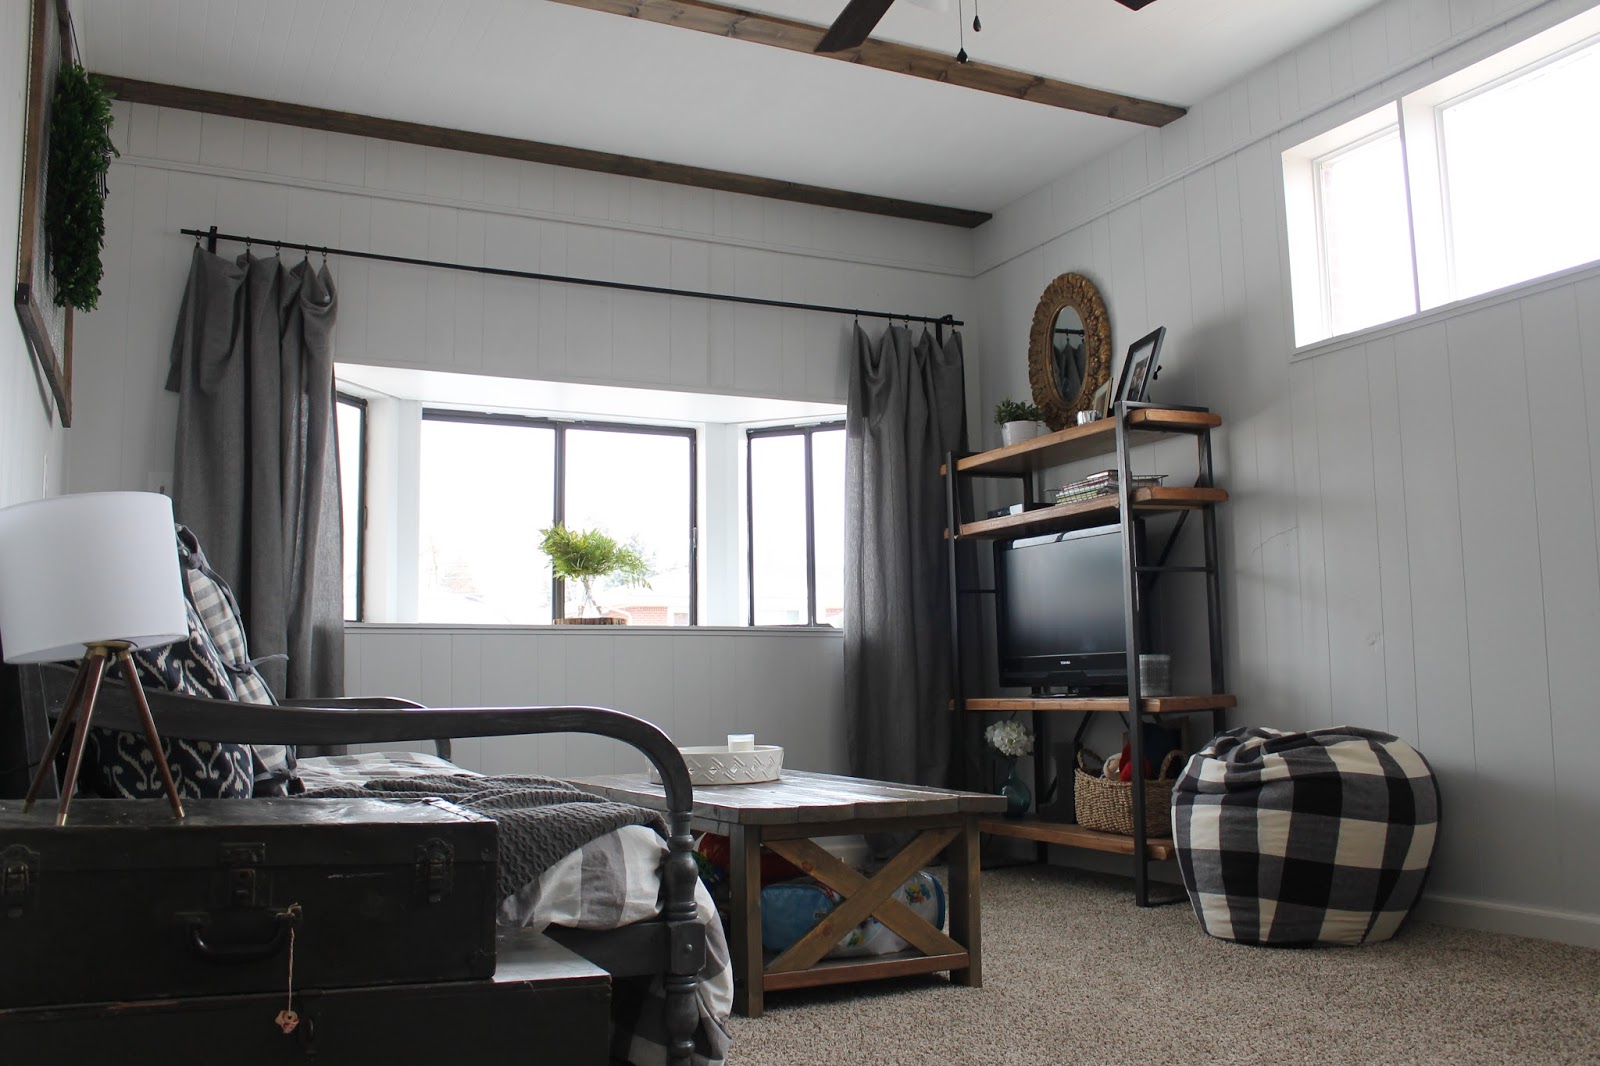
9.  Before you start working on your house, think about the layout.  I assumed we would keep certain rooms the same.  For example, our kitchen table is in the sun room.  I regret not moving it into our front room so: A. Our front room has purpose and B. The kitchen table isn't sitting on carpet {I'm looking at you Mack} and finally C. Our sun room could have more comfortable seating.

10.  Your house will not look perfect.  I remember when we first started and the projects were not coming out magazine perfect, especially up close.  I think I had this expectation that things could look brand new and that just wasn't going to happen.  I think if you take everything down to the studs or hire the perfect contractor then it could, but that wasn't the way we wanted to do things.

11.  Know that projects take time.  I know you have seen Chip and Jo flip a kitchen in what seems like a week but that is not going to happen. I don't even know if that would happen if you hired it all out.  I'm talking months.  You have to be okay with cooking with only a Crockpot or the stove.  Or... you could be like me, and become the take-out Queen! Haha.

Okay, that is all I can think of!  Please ask me any questions you have!  Tall Tan Man and I both agree that we wouldn't take on this big of a fixer upper again unless we had a lot more help.  I think a home built in the last 20 years might be more enjoyable for us.  The good thing about doing everything yourself is that you learn what projects you like and what you don't.  I don't think Tall Tan Man will ever replace all of the switches and outlets again, and he definitely won't grout and finish tile again unless he has to.  I would just prefer not to caulk and paint baseboards 36 weeks pregnant.  :)

{Leslie}

Linking up with:

Tuesday: Turn it up TuesdayTutorial & Tips Link PartyTwinkly TuesdayTuesday with a TwistInspire Me TuesdayTalk of the TownCreative Muster PartyWow us Wednesday, Winter Blues Wednesday 

Wednesday, February 15, 2017

the inside of our house is "finished" !!!


Do we look like babies or what?!  This was back in 2014 during our first demo day!  We had just removed the 40 year old double oven and thought our house flip would take only a year...  We were just off by a year or so! ;)

Man oh Man...  I can't believe our flip is almost finished!  This house was our 11th house to offer on and about the 85th house we looked at.  The Denver housing market is absolutely nuts. (Which is now a good thing!)  Tall Tan Man didn't come with me to look this house because he needed a break from house shopping.  I knew the second I pulled up in front, that I wanted this house {just like the other 10}, but I tried to not get my hopes up.  I still remember where I was when I got the phone call that we got it.  It is crazy to think of all the memories we have made in this home.

Well you better grab a cup of coffee and put your feet up, because I am fixin' to show you about a million before and afters! :)

-Entry Room-


This was the first thing you saw when you walked into our house.  We removed the wooden wall, painted, installed new baseboards, {ripped out the carpet}, {sanded} and {finished the hardwood floors}.


A different before view in the entry room.


We also {painted the front door}, {updated the light fixture}, and cleaned up the window.

 
-The Hallway off of the Entry Room-


We did the same updates as we did in the entry room with {this} light fixture update.


-The Kitchen-

Ain't she a beaut? haha This room has taken the most work and maybe caused the most fights... kidding, kind of.  We put in new appliances, {tore out the hood, sofets, and the island}, and then added recessed lighting.  Tall Tan Man {created a built in trashcan}, {extended the kitchen cabinets}, and {added open shelves}.  Then we along with both our families {painted the kitchen cabinets} and added the subway tile back-splash and replaced the counter tops. 


-Sun Room-


Oh the stupidest wall ever created... We {removed the wall}, painted the ceiling, textured and painted the walls, removed TWO wall AC units, added carpet, {DIYed some light fixtures}, removed some paneling, added trim, and scraped liquid nails off the brick.  You can see more details of all that {here}. 


Now, one idea Tall Tan Man and I are contemplating is painting this brick.  Originally I really wanted a brick accent wall, but it just doesn't blend well...  I'd love to hear your thoughts:


-Garage Room-


This room was our last room to finish and it was a major doozy.  We had to remove a massive gun safe, fixed the paneling, paint the paneling, replace the carpet, lots of trim work {and caulking...},  and finally updated the ceiling {post to come!}.  You can read more details {here}!


Another before angle.  


After!


-Guest Room-

This room was first our office but after Mack was born we converted it into a guestroom.  Who wants to come sleep next to our baby that doesn't sleep through the night??? ;)  After updating the floors, {we painted the paneling}, I built a {roman shade}, and {painted the closet door with chalkboard paint}.


-Mack's Room-


Mack's room was an easier flip.  The big projects were painting and refinishing the floors.  You can read all about how I decorated Mack's room {here}, {made him a side table}, and {DIYed his rocker}


-Hall Bath-


This bathroom was an ugly hodge podge made even more fabulous with a blue bathtub.  Everything but the tile in this bathroom is new, even the $0.01 light fixture!!  All the details are {here}.


-Master Bedroom-


This room was mainly cosmetic fixes.  We {ripped out the carpet}, {sanded}, {refinished the wood floors}, painted, updated the ceiling fan, and Tall Tan Man repaired the hole in the wall.


-Master Bath-


This room got COMPLETELY gutted, and we pretty much stole this vanity for $89!!!  You can read all about it {here}.


-Basement Stairs-


You can read all about how I did this project for only $65 {here}!!!

Ok, that is it!  Which was kind of a lot...haha.  Tall Tan Man keeps saying, can we sell it yet?  I always say no.  :)  We bought this house for two reasons; 1) For this to be an investment property
2) Learn how to fix up a house.  Although I do hope we make some good money off this house, I'd like to live in it for a little while longer.  Pahhhlease, Tall Tan Man.

I know I said we were done with the flip but that isn't completely true.  We still want to update the landscaping in the front yard, but if we had to sell the house today, we could!  If you are still reading, thank you. :)  This house has taught Tall Tan Man and I a bunch and I plan on sharing that soon.  Y'all have a great weekend!!!

Thursday, February 9, 2017

Valentines Oreo Hearts

 
Happy {almost} Valentines!  These Oreo Hearts would make a perfect dessert for your favorite shmookums.  When I was making {Oreo Footballs} for the Super Bowl I realized the cookies were HUGE!  I had a little bit of the Oreo mixture left so I decided to make bite sized hearts instead.  The worst part of these cookies is that you can eat 10 of them before breakfast and not even realize it... 


Since I posted the {recipe} last week, I decided I wouldn't share it again, but I would share a couple tips on dipping the hearts.  The hearts were a million times easier to dip than the footballs!!!  Once you take the frozen hearts out of the freezer poke them with a toothpick, and dip the heart.


As you take the heart out of the chocolate make sure you tilt it with the point down.  This will make the chocolate stay smooth.
 

 If you are using sprinkles make sure to apply them right away!


Here are two other Valentines desserts that will not disappoint.  :)

http://www.wonderfullymadebyleslie.com/2015/01/red-velvet-valentines-cookies.htmlhttp://www.wonderfullymadebyleslie.com/2015/01/valentines-blondies_24.html

I hope you have fabulous week, and a weekend full of baking! 

{Leslie}

Tuesday, February 7, 2017

Mack's 12 month basket picture!

Oh my goodness, I have a busy and sweet one year old!!  Mack had a busy month of becoming super mobile and perfecting is throwing motion.  Unfortunately, his throwing motion happens mainly at meal time and it doesn't matter if the chicken has ketchup on it.  This month Mack {knock on wood} has been sleeping much better!!! Woo hoo!  He had been waking up at random times during the night and crying/yelling/talking.  It was no fun and I was spending way too much money on coffee...  This basket was the first thing I bought when I found out I was pregnant {not counting a second pregnancy test}.  I might take another picture when Mack turns 18 months or 18 years, we will see.  :)


And here is our crazy boy!!!


For the first time in months he didn't fight the basket picture.  I think he was actually enjoying himself. haha  Mack has become a fickle eater... He doesn't like to mix his food and refuses Chick Fil A french fries.  WHAT?!  I don't know how that is possible...  Mack still doesn't have any words.  A couple times he has said mahhhh mahhh but I am not sold that was his first word.  


Alright y'all, thank you for stopping by to look at my adorable baby that might not be considered a baby for much longer.......... wahhhh 

I'll be back later this week to share a yummy Valentines dessert! 

{Leslie}

Saturday, February 4, 2017

Oreo {Foot}balls!!!


 Hi there! I just wanted to pop in really quick and share these cookies I made yesterday!  If you have never had an Oreo Ball then... A.) What rock have you been living under? ;) and B.) Go make this recipe right now!!! Oreo Balls have been a go to recipe for me because they are always a crowd pleaser.  For the Superbowl I knew I wanted to make a football themed food and saw a similar idea while watching the Today Show this week.  The hardest part of this project was dipping the footballs because I could only find a 3 inch football cookie cutter.  These cookies are closer to life size than I would like...haha If you can find a smaller football cookie cutter then this recipe will be a breeze!

Oreo Football Truffles

Ingredients:

Regular Sized Box of Oreos
8 oz Cream Cheese {softened}
Chocolate Almond Bark
1/4th Cup White Chocolate Chips

Directions:

1.  In a blender or food processor pulse your Oreos.  You will want to do this about 6 oreos at time.  Place crumbs in a mixing bowl.

2.  Using a paddle attachment, mix the Oreo crumbs and cream cheese until smooth.

3.  Cover a baking sheet with parchment paper and flatten the mixture to about 1/2 inch depth.  I used a second sheet of parchment paper on top to flatten the Oreo mixture {see picture below}.


4.  Refrigerate mixture for about an hour until almost frozen.  Now use your cookie cutter to make the footballs.  I did this just like I make Christmas sugar cookies.  Once I ran out of space for more footballs I re-flattened the oreo mixture and cut more cookies.  The mixture does get harder to work with the warmer it gets.


5.  Put cookies back in the freezer for 15-30 minutes so they keep their shape when you are dipping them.

6.  Melt the chocolate almond bark according to package directions.  My intention was to only dip one side of the football but this was almost impossible {again if I had smaller footballs this would of been much easier}.  Drop a football into the chocolate and use two forks to flip it over.  Try not to mess up the chocolate as you flip it over.  Once your football is flipped over use one fork to shake excess chocolate off. 


7.  Place back on parchment paper.  Some of my footballs looked a little deflated... Seemed fitting for who is playing in the Superbowl!

8.  Melt white chocolate chips in the microwave, about 45 seconds.  Put melted chocolate in a zip lock back and cut a small whole the corner of your bag.  Now make the seams!


Store your cookies in the refrigerator until it is party time!  I hope everyone is having a wonderful weekend!

{Leslie}
Related Posts Plugin for WordPress, Blogger...