photo HEADER2_zpsztxreyz7.png

Wednesday, February 25, 2015

DIY Orb Chandelier


Welcome to this week's addition of Wonderfully Made Lighting! I am sorry if you are getting tired of all my lighting posts...but last weekend I read that updating lighting is one of the best ways to fix up a house! Check and check! This is a project I have always wanted to try and I was found this Orb at TJ Maxx:


It was only $10 and the perfect size!  Here was the original light...


I don't know about y'all but I saw some serious potential. 


How about now?


Okay, now!


I took all the parts I was going to use and spray painted them with ORB spray paint.  Tall Tan Man was able to cut through the top of the Orb with his dremel and drill.  Similar to, The Bachelor this week; there were sparks flying!


I re-attached the original part of the chandelier.


For old time sake here is what we started with:


I think we have made quiet an improvement!  I have been scouring all over for some real living room chairs that don't cost a stupid amount of money. 


I am pretty excited about our $10 light!


Alright, I am ready to get this week over so I can head to the mountains!

{LJ}

Linking Up:
Living Well Spending Less
Monday Funday
Crafty Blog Stalker
The Blissful Bee

Monday, February 23, 2015

Easy DIY Framed Monogram


I love projects that take less than 10 minutes, because I do not have the longest of attention spans...Ask Tall Tan Man. I am trying not spend lots of money on decorating right now, because we need things like baseboards, paint on the walls, and floors...  I am also encountering having to decorate an entire house rather than a one bedroom apartment.  Here is the frame I decided to redo:


That hasn't been my monogram for FOREVER / two years.  I am bad at throwing things away, shhh.  I can't seem to find the tutorial I did for the monogram so I will explain real quick how I got the linen to stay in the frame. I cut a piece of cardboard slightly smaller than the size of what the glass/matting would be.  Wrap the cardboard with linen and attach with hot glue. 


I found this J at Sample House in Dallas for only $5.  Next was gluing the J down with the hot glue.


Things are looking more and more like home around here!


{LJ}

Linking Up:
Crafty Blog Stalker

The Blissful Bee
Living Well Spending Less

Monday Funday 
 

Sunday, February 22, 2015

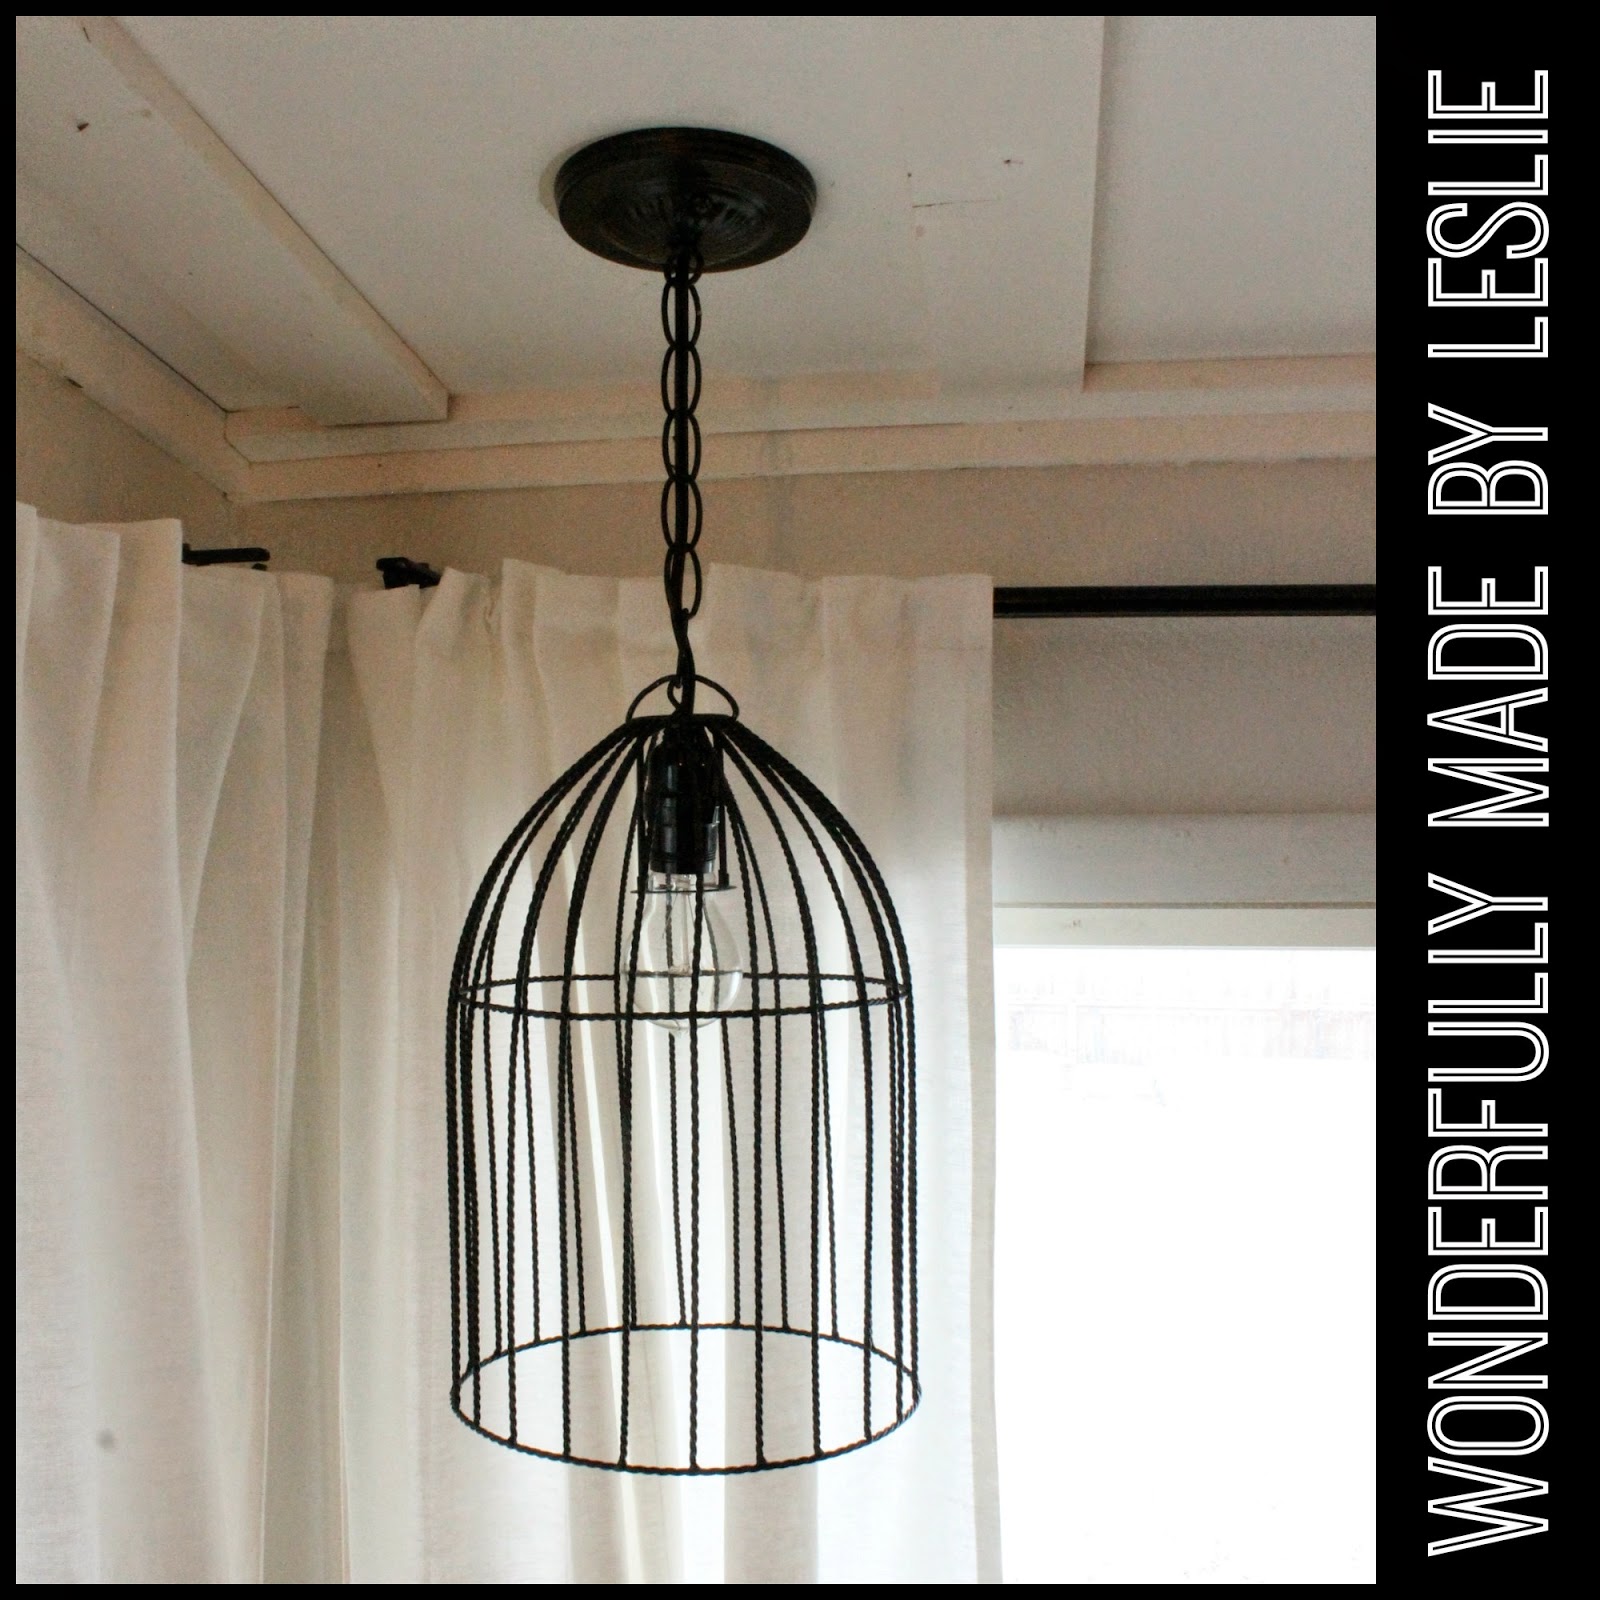
DIY Ceiling Light Fixture


We are on a light fixture roll!  I am happy to say the lighting in our sun room is officially done.  It took us me forever to decide what to do on the sitting area side of the sun room.  We could not just buy a normal ceiling fixture because the lights were not hooked up a switch and therefore needed an on switch {I had to explain that a million times to home depot employees, so hopefully I just made sense}.  


Here is the cost break down of everything:

Lamp Shade {Hobby Lobby}: $24
Chain {Home Depot}: $5
Ceiling Canopy Kit {the thing on the ceiling, spray painted with ORB}:  $7
*Lighting Kit: $7

Total: $43 {$74** for both}

* We had a such a hard time finding a lighting kit that had an on and off switch at the bulb.  I bought the smallest clamp light {this one} from home depot and took off the clamp. 

** Only needed one chain for both and they gave me one light kit for free because it was missing its tag.  I didn't want y'all questioning a math teacher's math.  ;)

To make this; I first spray painted the canopy kit with Oil Rubbed Bronze.  Put the lighting kit into the top of the cage.  Attached two rings to the top of the lamp cage and strung them together with the desired chain length.  Ran the cord through the chain.  Then ask your husband to install the light. 


We are using some AWESOME edison bulbs I found at the home depot!!!


One step at a time, y'all, one step at a time!  Our house will eventually be finished and hopefully beautiful!


Church was cancelled so I am on my second cup of coffee watching the snow fall.  It sure is pretty!  

Hope y'all had a wonderful weekend!


{LJ}

Linking Up:
Crafty Blog Stalker

The Blissful Bee
Living Well Spending Less

Monday Funday 

Thursday, February 19, 2015

how to update Ikea curtains that have loops


Hello people!  Sorry I have been so MIA... I am already screwing up my {New Years Resolutions}.  It has been a crazy couple of weeks, but we're suppose to get 15 inches of snow this weekend so I will be hunkered down!  I am really excited about it!!! We have been working really hard on the sun room this last month and it is looking SOOO much better.  Tall Tan Man has been doing a ton of dry walling and I have been sewing... I am glad he loves me.  :)  I bought plain white panels from Ikea, because I needed 6 panels and they are only $20 per pair.  When I hung them up they looked so saggy and unfinished.  I found {this tutorial} and decided they would look more finished if I got rid of the loops. 


FYI: This project is fast and does not take any advanced sewing skills.  


On the first panel I pinned the loops before sewing them down.  Then I decided not to waste my time pinning them and it worked just fine!


You will sew the loops down along the already existing hem.  This creates the new loop you will use to hang the curtains.  

What do you think?

Lots of snow on the ground makes it almost impossible to take pictures of windows... Anyway, I think these new finished curtains helped our room look so much more finished!


I am hoping to show you a couple more pictures of the sun room this weekend!  I hope you have a FABULOUS FRIDAY!

{LJ}

Linking Up:
Crafty Blog Stalker
The Blissful Bee
Living Well Spending Less
 Monday Funday

Saturday, February 14, 2015

Two Years


Running late for dinner 
skipping lunch 
me not taking any test shots with the self timer 
the picture above

It seems that our 2nd anniversary pictures didn't turn out any better than our {1st anniversary pictures}.  I love my Tall Tan Man, but if I want good, smiling pictures I need to be more efficient.  The picture above was after I realized we needed to be closer to each other. The first couple pictures we took are pretty darn awkward...


I think he is leaning away from me in that one...I bet he is thinking, 'Can we please go to dinner now?'  Oh don't you worry.  Cute pictures > dinner.  They just kept getting better. 


Love this man, and his humor.  Hope y'all had a wonderful Valentines!


{LJ}

Linking Up With:
Monday Funday

Wednesday, February 4, 2015

Pretzels + PB + Chocolate


Hi friends, some days chocolate is necessary.  Peanut butter is necessary everyday.  If you are having one of those days then this recipe is PERFECT for you.  Back in middle school I loved Nutty Bars and eating these Chocolate Peanut Butter Pretzels remind me of those days.  I stumbled upon this recipe on {Baker by Nature's} blog.  I love the recipe because... 1. The flavor. 2. They look like hearts. 3. They are quick to make.  My only struggles were getting the PB to be smooth and some of the peanut butter was sticking to the bottom of the tray {even after being refrigerated}.  Regardless of my struggles, I will make these a gazillion more times. 


Are you headed to the store yet?!  GO! 


I think this will be my last Valentines recipe... 

maybe...

Cheers to the week being half way over! We got this!

{LJ}

Linking Up with:
Blissful Bee

Monday, February 2, 2015

Blinded by the...


Happy Monday!  I have a love/hate relationship with lighting.  I LOVE beautiful & unique fixtures, but I do not love the price tag that usually comes with them...  The main level of our house has 12 light fixtures and all 12 needed to be replaced.  We have crossed a couple off our list starting with my favorite World Market Orb Chandelier for only $112. 


Our kitchen now has recessed lighting {I need a new picture bc the ceiling has now been painted!}...  Four lights cost us $100. 


If you can just ignore all the ugliness around this next light then you will see my second favorite fixture.  This one I found at Target for $22! 


Alright, so I want to share a quick lighting DIY with you.  The hallway next to kitchen had this lovely chandelier hanging nice and low for my TALL Tan Man. 


I decided that we needed a flush mounted light and I really didn't want {one of these}.  I stumbled up this light at Habitat for Humanity Restore for $3 {and it was 20% off, holla}! 


First, I taped off the light with painters tape.  Then I sprayed the fixture with Oil Rubbed Bronze spray paint.  


 I am pretty pleased with my $9 flush mount!  I need to go back and clean it up, because we painted the ceiling this past weekend.  Hope y'all have a wonderful week! 

{LJ}


Linking Up with:
Blissful Bee
Related Posts Plugin for WordPress, Blogger...