photo HEADER2_zpsztxreyz7.png

Tuesday, April 28, 2015

Terracotta + Puff Paint


Hello!  SO sorry I have been MIA lately, life has been a little hectic and I have had a stupid cold...  I keep telling myself that I will survive this spring!  Can I get an Amen from the teachers reading this?  This project came about because our kitchen table needed a little sprucing up, and I was needed an easy project while stuck on the couch this weekend.  This project only requires 5 things and costs $10!!!

Terracotta Pot
House Plant {I got mine from Home Depot}
Pencil
Measuring Tape
White Puff Paint


I love this project because you can do any pattern you want.  I was wanting tribal/geometric/fun pattern to make the room feel more summery.  To make my pattern I used a measuring tape and made tick marks every 1/2 inch around the rim of the pot. 


I made another row of tick marks every a half inch below the ones I already made.  Then I connected the dots with diagonal lines. After the first couple rows were finished I applied the puff paint onto the pot.  The only tricky part of this was getting the dots close to the same size. The real reason I decided to work on the pot in sections is because I am a wimp...but the puff paint made my hand cramp when I tried to do too much at the same time! ha


I continued the same process until the pot was covered with puff paint!  


What do you think of my new tray?  That was my lone Lily Pulitzer purchase from the Target craziness.  I wasn't planning on going to Target, because I didn't even want to know if they had anything left at 9am.  Then we ran out of toilet paper.  I HAD to go.  No other option.   

Cheers to it being Wednesday and the weather being back in the 70's.  I don't know if I can handle any more weird looks...Don't these Denver people know that 50 degrees is cold?

{Leslie}

Linking Up With:
The Idea Box 
Thrifty Thursday
The Handmade Hangout
Shabbilicious Link Party
Karen's Up on The Hill 

DIY Vintage Chic
Link Party Palooza 
Monday Funday
Crafty Blog Stalker 
DIY Showoff 
Tip Junkie
The Party Bunch

Monday, April 20, 2015

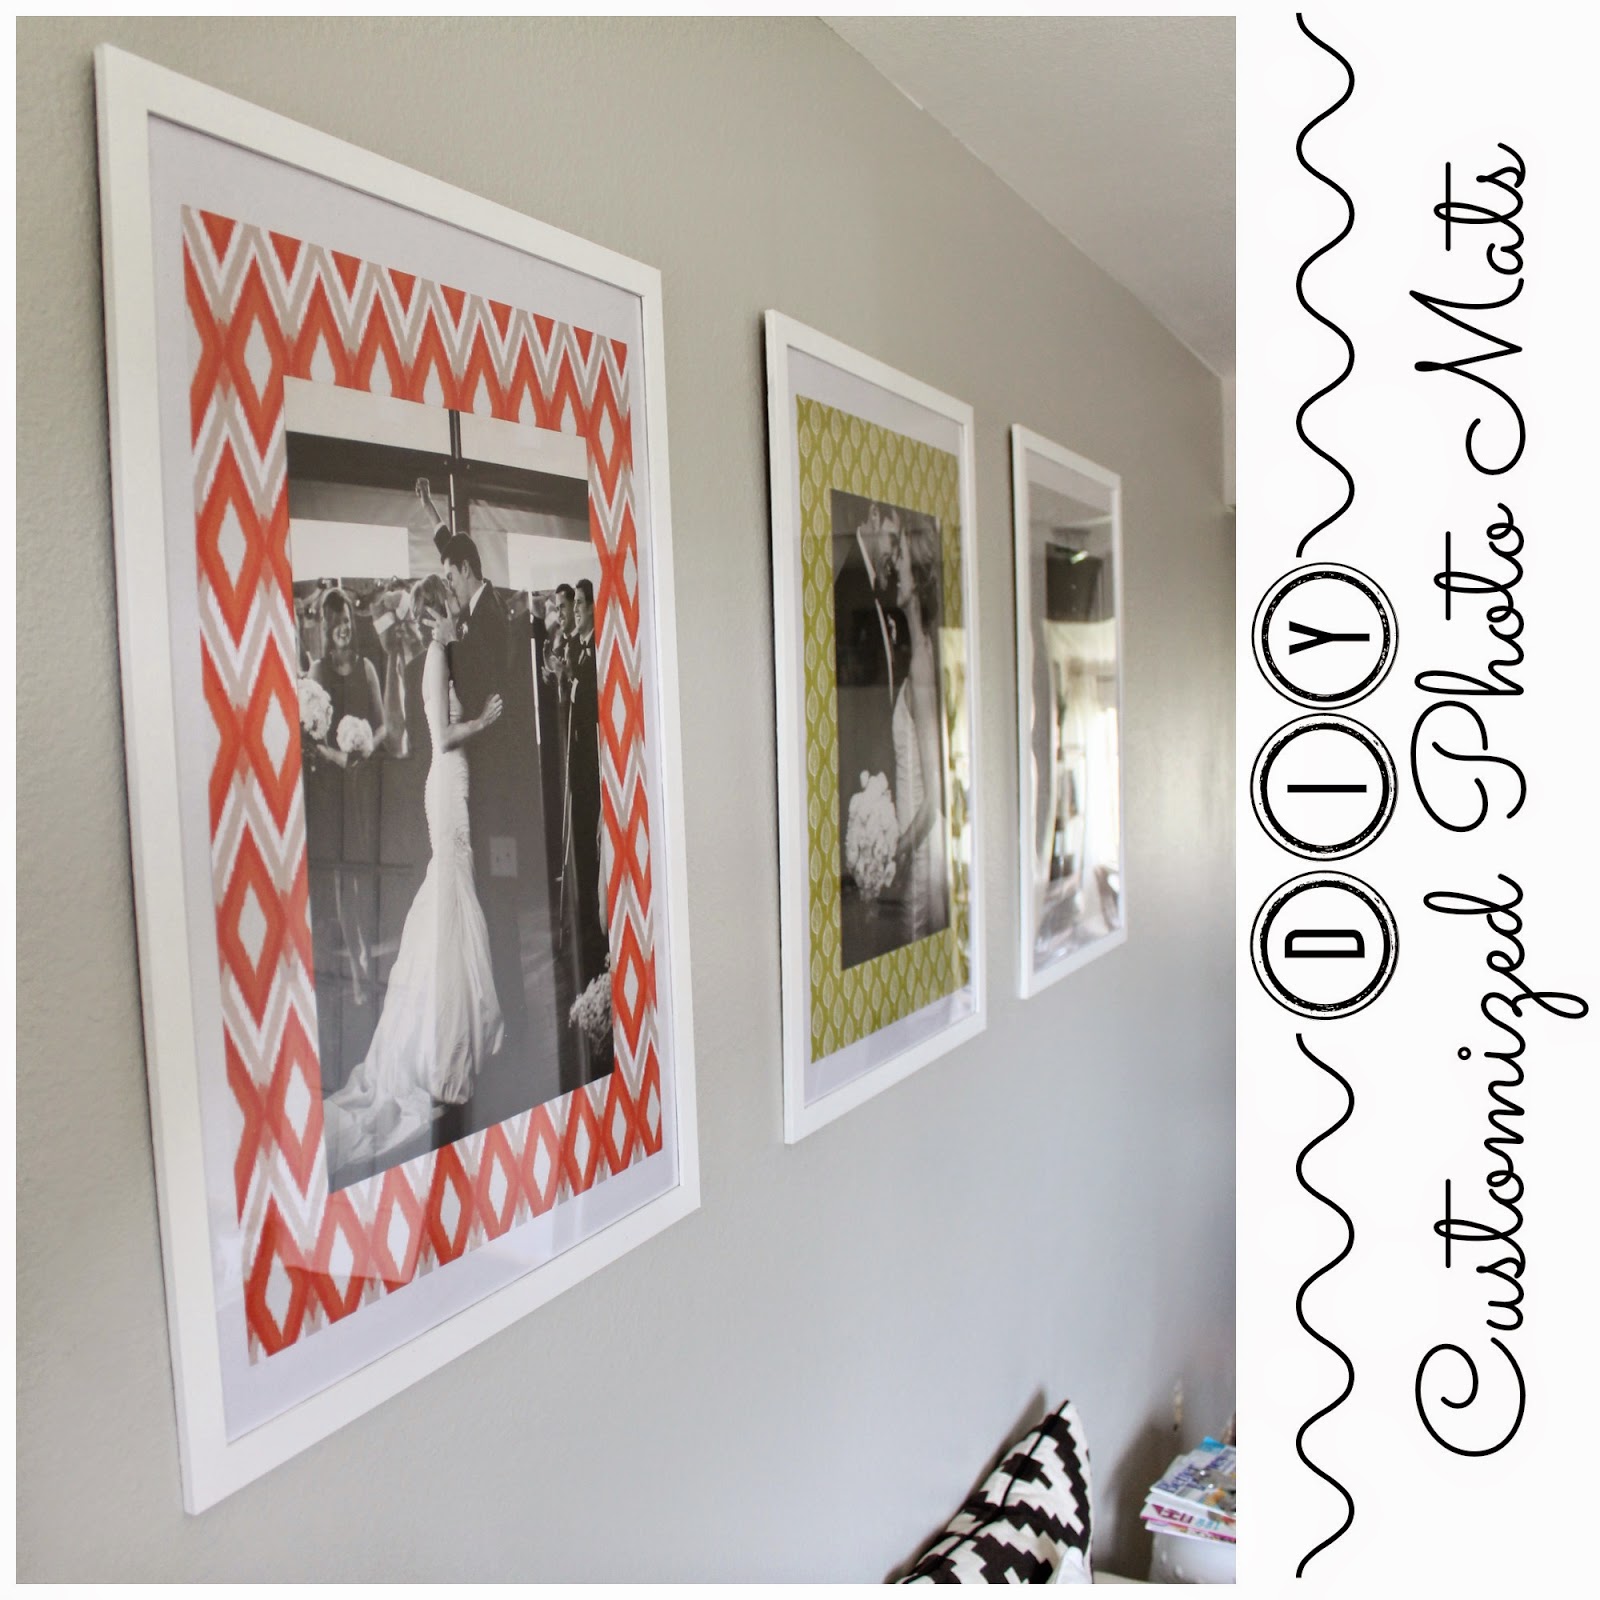
Frames with Customized Mats


 Hello!  I hope you had a fabulous weekend.  We did a bunch around the house and I barely had a chance to sit down.  I posted a couple weeks back about our {new chairs} that I am still obsessed with.  After buying the chairs, I really started thinking how we could decorate our entry room.  The room is so open/awkward with bigish walls, and I couldn't decide if I wanted a gallery wall or just a big picture.  The other day I was doing my usual...trying not to eat everything in the pantry and catching up on some of my blog reading when I finally found my inspiration.  The Beautiful Mess is one of my favorite blogs and {this post} about Patterned Photo Mats from wrapping paper was totally awesome!   The ONLY thing I did not love about their tutorial was that the frames cost more than I wanted to spend.  I went to Michaels, Hobby Lobby, and Joanne's looking for a good deal, but could not find the size or price I wanted.  After my craft store defeat I headed over to Ikea to get 1000 more steps in, and check out their poster sized frames.  I ended up getting three of these frames:


Now if you can afford other frames I would highly recommend it because the Nyttja frames were not meant to be painted.  I ended up having to paint them first with an oil based primer just so the paint would stick.   I did not have any spray paint primer at home so I just used a sponge brush.  After the primer dried I painted the frames with a plain white paint I had in my craft supplies.  

Up next I went on a wrapping paper search.  I was pretty excited at Target when I...

a.  discovered they have a new craft aisle

b.  the craft aisle had a 3 pack of paper that was almost the perfect size

c.   and a bunch of other things I really NEEDED!

:)

I had to cut 1 inch off the width of the paper so the proportions looked right. 


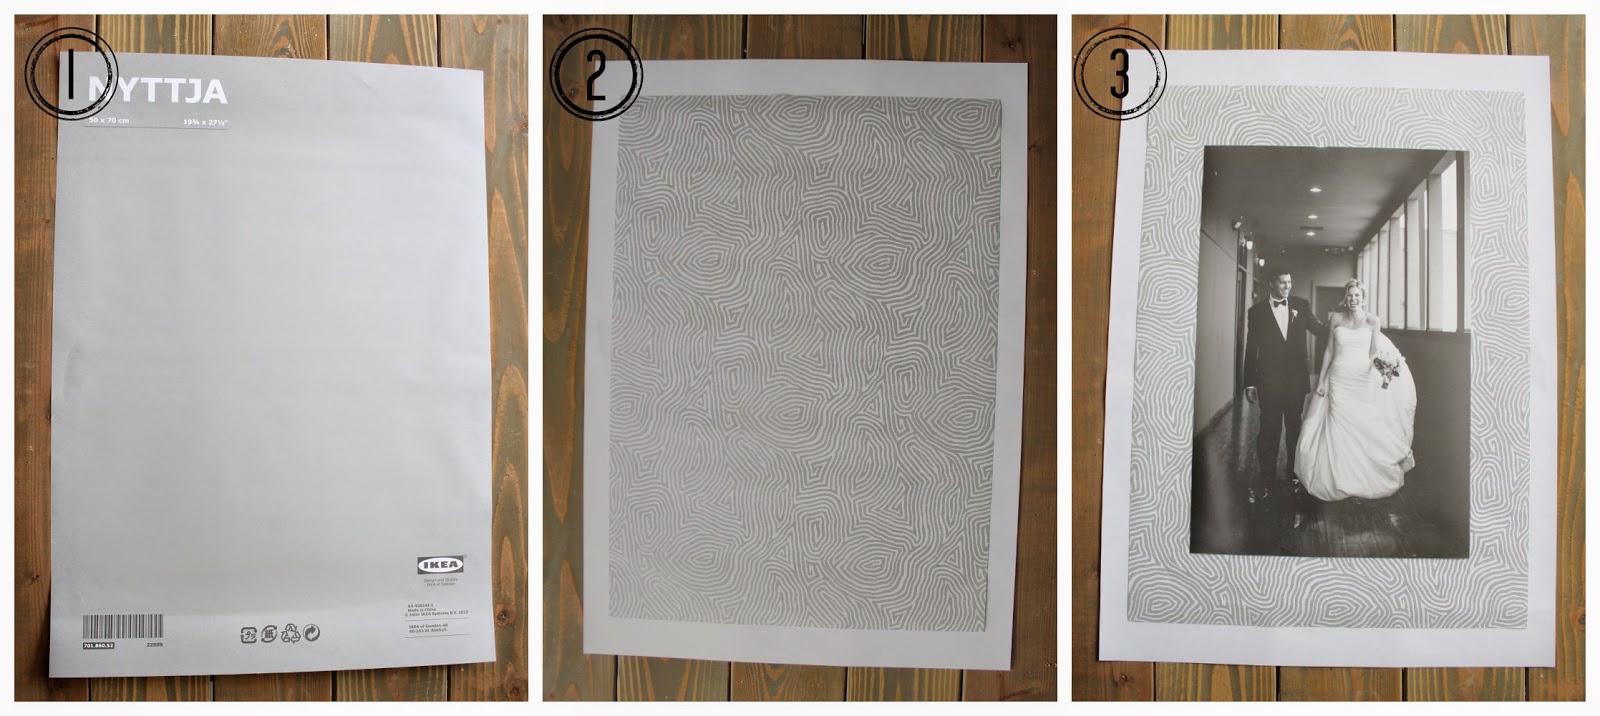
1.   Now make sure when you are painting the frames that the paper that came inside doesn't get bent.  Flip that paper over and use that for the backdrop.  

2.  With a ruler and double stick tape, center and attach the patterned paper to the white backdrop. 

3.  Center a 12 by 18 inch photo on patterned paper and attach with double stick tape. {I ordered my photos at Walmart}


I think they turned out pretty!  It is definitely the unique and not too busy look I was going for.  Our total cost was only $43!!!  We already had 2 of the pictures, and the white paint.  Alright, I am back to scraping liquid nails off of brick.  Aka the most fun that could ever be had. 

{Leslie}

linking up to:
Tip Junkie
Artsy Fartsy Mama
The Idea Box 
Thrifty Thursday
Shabbilicious Link Party
Karen's Up on The Hill 
Gingerly Made 
Pieced Pastimes 
The Party Bunch
It's Overflowing
Monday Funday
DIY Showoff 
The Handmade Hangout 
Link Party Palooza

Wednesday, April 15, 2015

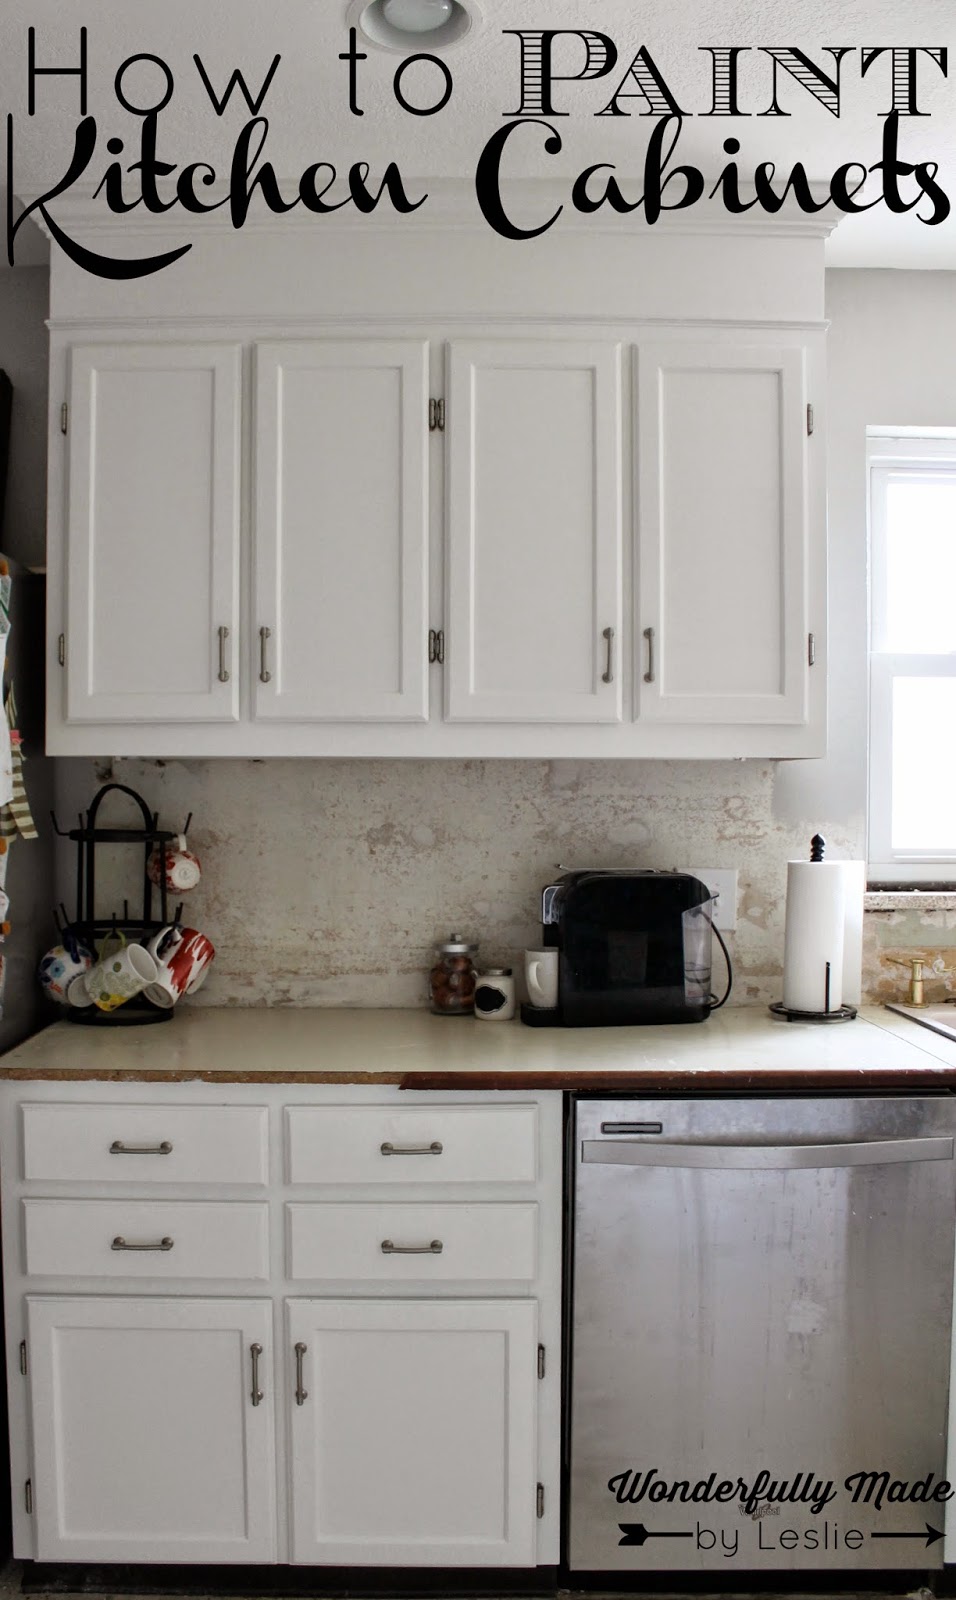
How to Paint Kitchen Cabinets


Hello!  First off, thank you for all the sweet comments on Facebook and Instagram! :)  We love our cabinets SO much.  The kitchen looks so much bigger, cleaner, and lighter!  

Supplies:

180 and 220 Sandpaper
Sandpaper Holder {like this}
Lots of Rags
Cheap Brush for the Primer
Oil Based Primer {Zinsser Cover Stain}
Dixie Cups
Benjamin Moore ADVANCE {Dove White}
*Benjamin Moore Ultra {Dove White, for the inside of the cabinets}
Mini Foam Roller and Low Nap Rolls
Nice Brush {purdy -  all day, every day} 

Directions:

Day 1 {or a couple late nights}:  Empty out the entire kitchen.  We had tables and baskets where we kept everything.  Remove all the drawer and cabinet pulls.  Keep all the screws organized because they should be the correct length for your new hardware! Label all your cabinets and drawers with numbers and make a key of your kitchen.  You will have to move the numbers around as you paint.  Remove all the drawers and the tracks from the drawers.  Tall Tan Man and my Momma thought removing the tracks was overkill, but I thought it would make it look more professional.  

Day 2 {all day}:  We sanded the drawers and all the cabinet doors lightly with 180 grit sand paper.  Our cabinets hardly had any varnish left on them so we did not have to do a lot of sanding.  You really want to make sure that you rough up the surface and there is no grease left behind.  You might need to buy a de-greaser from Home Depot if you notice a lot of grease on your cabinets.


Wipe down all your cabinets to get the dust off and get ready to do some priming!


We primed the drawers and the front of all the doors at the same time.  The re-coat time on this primer is 1 hour.  We did two coats of primer. 


We were not done yet!  Yes, we had a very looong day.  We removed all the doors {and hardware} from the cabinet faces.  Next we primed the back of the cabinets doors once then rested the doors on pixie cups. 

Day 3: VERY lightly sand all the primed doors and drawers.  We sanded a little too much primer off which unfortunately allowed old stain to bleed through the paint.  It was terrible...I might of cried and cussed multiple times.   Lesson learned.  Our cabinets could not have any brown showing through for the paint to stay white. 


I am sooo thankful we had so much help on this day.  My wonderful Mother-in-law sanded the ENTIRE rest of the kitchen with 180 grit sandpaper.  She was a sanding machine!


My Momma came through after with a damp cloth to wipe off the dust.  Then painted everything with the oil based primer using same cheap brush from yesterday.  To keep our brushes fresh we wrapped them in plastic wrap and kept them in the fridge {we weren't doing any cooking anyway!}.   


Outside Tall Tan Man began painting the back of the doors and drawers with our paint sprayer.  We have {this} one, we got super lucky and found it on clearance at Lowe's!


If you do not have paint sprayer then I would recommend using a mini roller.  The Benjamin Moore paint is self leveling, aka awesome, and all roller marks will level out over time.  The only terrible part about this paint is the dry time 15 hours!  Holy cow!  This puts watching the paint dry into perspective!

Back inside after we waited the one hour for the primer to dry on the cabinet faces we sanded them down with 220 VERY LIGHTLY.  I was a LITTLE paranoid at this point about sanding.  Next we painted the inside with the BM Ultra and the outside of the cabinets with the BM Advance.  The mini paint roller made this go super quick!


Day 4: Now that the 15 hour dry time is done we lightly sanded everything {doors, drawers, and cabinet faces} down with 220.  You are mainly checking for bumps or drips in the paint. 


Tall Tan Man sprayed the front of the doors & drawers outside.  The drawers were DONE! Make sure you check them for drips! I did the second and final coat on the cabinet faces.  I also painted the inside of the cabinets again! 

Day 5:  We did our last light sanding of all the cabinet door fronts and Tall Tan Man did the second and final coat of paint.  I also put our things back into the kitchen, because the inside of the cabinet paint was the "cheaper" paint. It was really nice to be able to organize everything without the doors on.  :)

Day 6: Let the paint cure!

Day 7: Let the paint cure!!

Day 8: Let the paint cure!!!

Day 9: Let the paint cure!!!!

Day 10: Let the paint cure!!!!!

Day 11: Let the paint cure!!!!!!

Day 12: Put the hardware back on your drawers and doors.  We found ours at Target! Now using your handy dandy key put the doors/drawers back where they belong. 


So. Much. Better.  


Take a nice look at those counter tops...they will be hopefully gone the next time you see this kitchen. :)

{Leslie}

Linking Up To:  
Artsy Fartsy Mam 
The Idea Box
Thrifty Thursday
The Blissful Bee
Gingerly Made
Pieced Pastimes
The Party Bunch
It's Overflowing
Monday Funday
DIY Showoff

Thursday, April 9, 2015

Kitchen Transformation


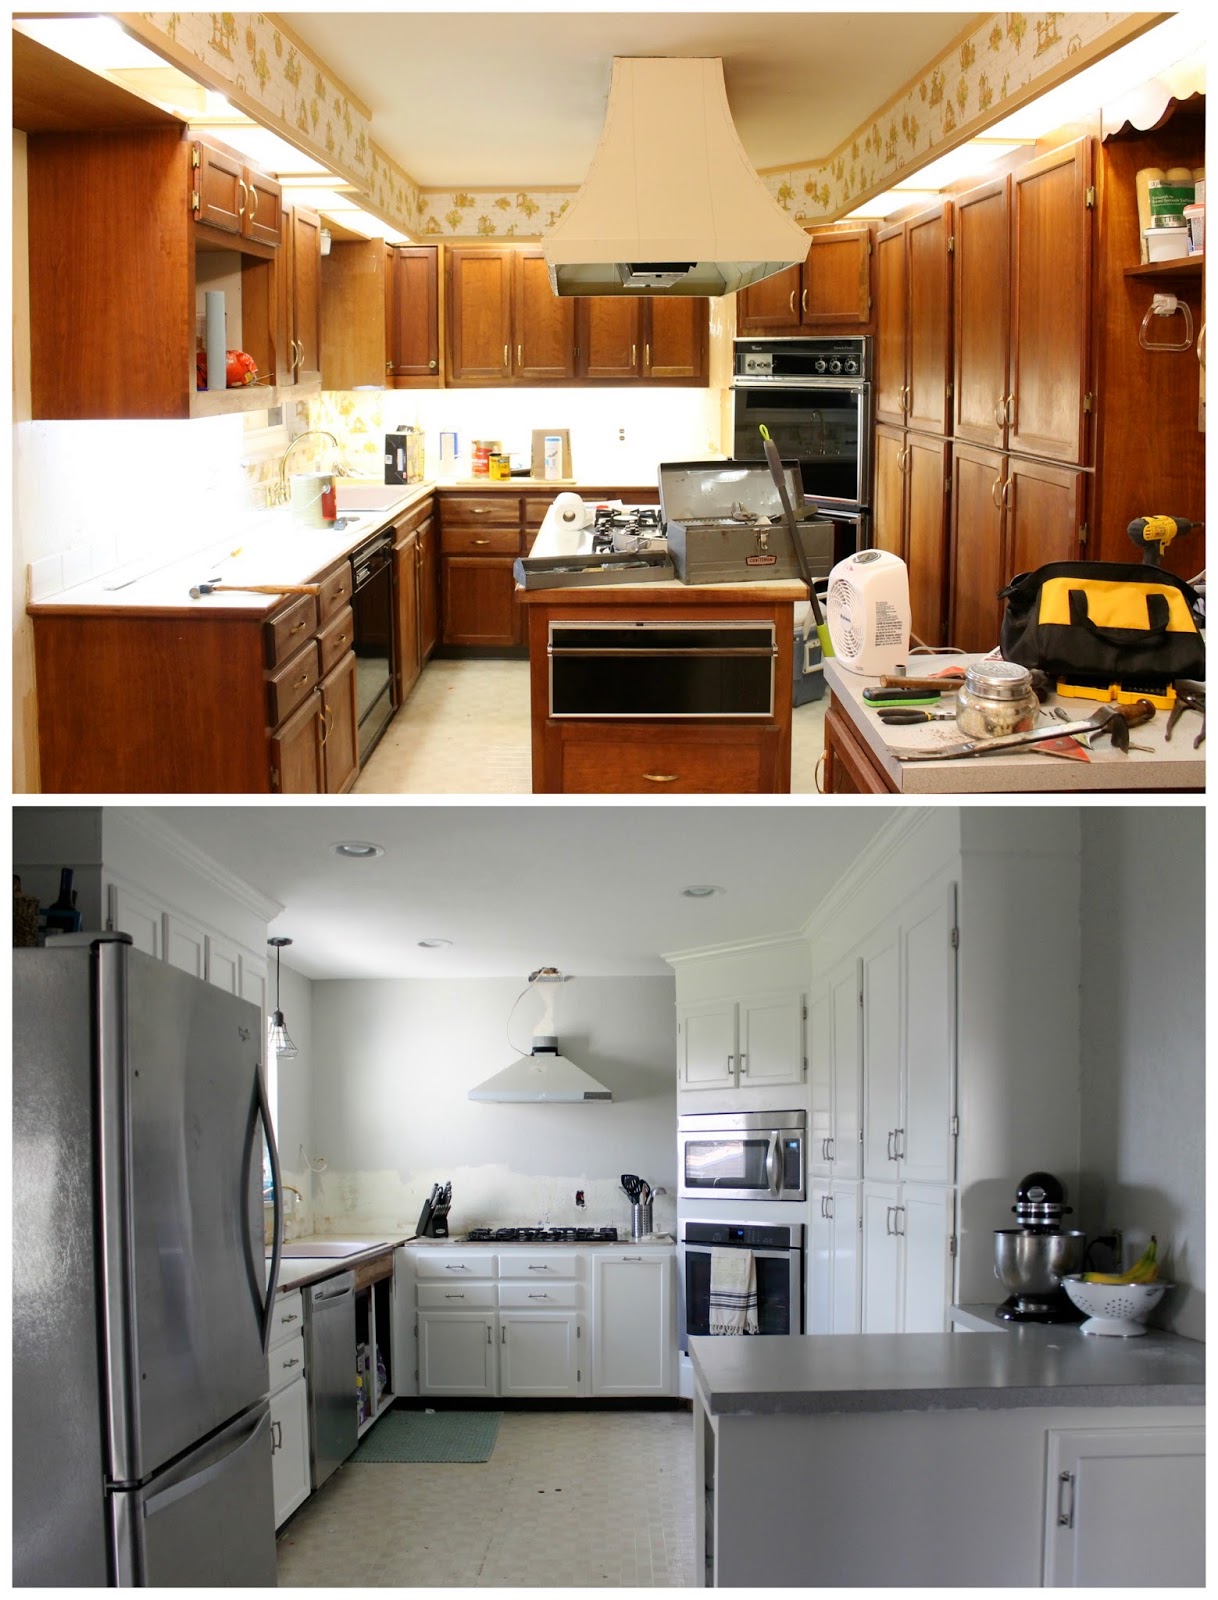
Happpppppy FRIDAY y'all!!!  I have been asked {by my Momma} to share some pictures of our painted kitchen cabinets.  What do you think?!


The before picture is almost unrecognizable!  I am working on two posts on how we went about painting the cabinets.  This was not a small {or easy} process, but I think the results are totally worth it!  


As you can see, we still have a little work to do.  Installing the counter tops is our next big project, and I am anxious to get started! 

I hope you have a fabulous weekend filled with lots of sunshine, hamburgers, and SLEEP {that's what I am hoping for, at least}!

{Leslie}


Linking Up To:
Shabbilicious Link Party
DIY Vintage Chic
I Heart Nap Time 
Gingerly Made 
Whipper Berry 
DIY Showoff 
It's Overflowing 
Karen's Up on the Hill
Monday Funday 
Crafty Blog Stalker
The Blissful Bee
The Idea Box
Thrifty Thursday

Sunday, April 5, 2015

Introducing you to the newest members...

of our furniture family! 


I am SO in LOVE with our new living room chairs!  Ahhhh :)  Since Christmas I have been stalking Craig's List, Goodwill, and Homegoods for the, Perfect Chairs.  I was wanting chairs that were a solid neutral color, medium sized, and affordable.  When I got April's HGTV Magazine in the mail I fell in love with the navy chairs in the picture below. 


Those beauties were $350 each... not quiet "affordable" according to Tall Tan Man.  We don't sit in our front room a whole lot and TTM didn't think we needed any furniture... So practical that husband of mine.  When I went into HomeGoods over spring break I about did a cartwheel when I saw our chairs...


It took all my strength not to buy them right away, because I needed to confirm the purchase with TTM.  They were $180 each which seamed super reasonable to me.  He gave me the yellow light and I slammed on the gas to go get them.  I thought he just needed to see them in the room.  TTM thought long and hard about them...


I begged...

 I showed him that they were so practical you could even dance on them...


That sold him!


Our house is looking more like a home!  Have you ever copied something you have seen in a magazine? 

I hope y'all have a great week! :)

Related Posts Plugin for WordPress, Blogger...