photo HEADER2_zpsztxreyz7.png

Tuesday, December 24, 2013

The Reason


Morning y'all.  Tall Tan Man and I are about to head out to see family.  Yesterday I showed you the front of our Christmas cards and here is the back.  I made this on picmonkey as well.  Hope you enjoy some time with your family and remember the real reason we celebrate Christmas. 


I am thankful for Jesus and how he humbly came to the world as a baby.  Our pastor talked on Sunday about how Jesus was born in a dirty barn, to scared and not perfectly clean young parents. So different from what many nativity scenes show.  Christ came knowing how much of a mess we are.  Pretty mind blowing when you think about it.  I am very thankful for Jesus.  Merry Christmas!


{LJ}

Monday, December 23, 2013

Our Christmas Cards


I had been looking forward to sending out Christmas cards for years!  We used one of the images from our wedding captured by the talented Caroline Jurgensen.


Happiest day of my life.  Merry Christmas from The Jarrett's!  We used picmonkey.com to design our cards {same website we used for our wedding invitations}, and printed them on mpix.com.  We were so happy how they turned out, great quality and super fast turn around!  Check out the last couple years of Christmas cards with my o-so-missed coworkers.


Enjoy your short week!

{LJ}

Saturday, December 21, 2013

Our Tree and Wrap Ideas


Happy Saturday!  Here is a little tour of our little apartment.  :)  I am pretty traditional when it comes to decorating for Christmas.  Here is our tree I have had since I was in college {girls, do you remember this in the 1015?!}. 


These are some of things I am loving with gift wrap this year!


Here are some more festive pictures from our home.  :)


All the fake snow you see is epsome salt.  If you want to learn how to make yarn pom pom's check {here}.

Check out past Wonderfully Made Christmas days:


{LJ}

Wednesday, December 18, 2013

Winter Sangria


Hi there!  One. More. Day.  I am so excited for some time off!!  I hope you get some time to spend with your family over the next couple of weeks.  If you're looking for a yummy beverage to serve at your next party this is perfect.  I found the recipe on pinterest {here} and sadly the link goes nowhere. 


Here is the recipe:


Enjoy!

{LJ} 

Tuesday, December 17, 2013

Making Real Christmas Wreaths


I am not going to lie, when I started this series I thought there was a 1 in 10 chance I would make it to the eighth day.  I did it!  Woohoo!  Now you'll just have to wait to see if I can make it to 12...  This year I decided to keep my fake wreaths in storage {shhh don't tell tall tan man I didn't get rid of them} and make real wreaths.  I will be completely honest during this post about the pros and cons of using real greenery.  


First off, I was pumped when The Home Depot had real greenery for sale on Black Friday for $5.  I bought two things of it, one for the mantel and one for wreaths.  If I were to do this again I would not of bought the greenery this early.  My wreaths have looked good for three weeks, but I don't think they'll make it to Christmas.  My greenery on the fire place was a different story...


I was so happy how this turned out, but living in Colorado means our fire place is on every night.  The greenery was dead as a door knob after two days.  You couldn't tell it was dead unless you touched it, so I kept it up for two weeks.  I might of had a little pity party when I had to take it down...  Anyway, I misted everything once a day which has helped the wreaths make it for three weeks.  Would I do this again.  Absolutely! Alright let's talk about making real wreaths! 
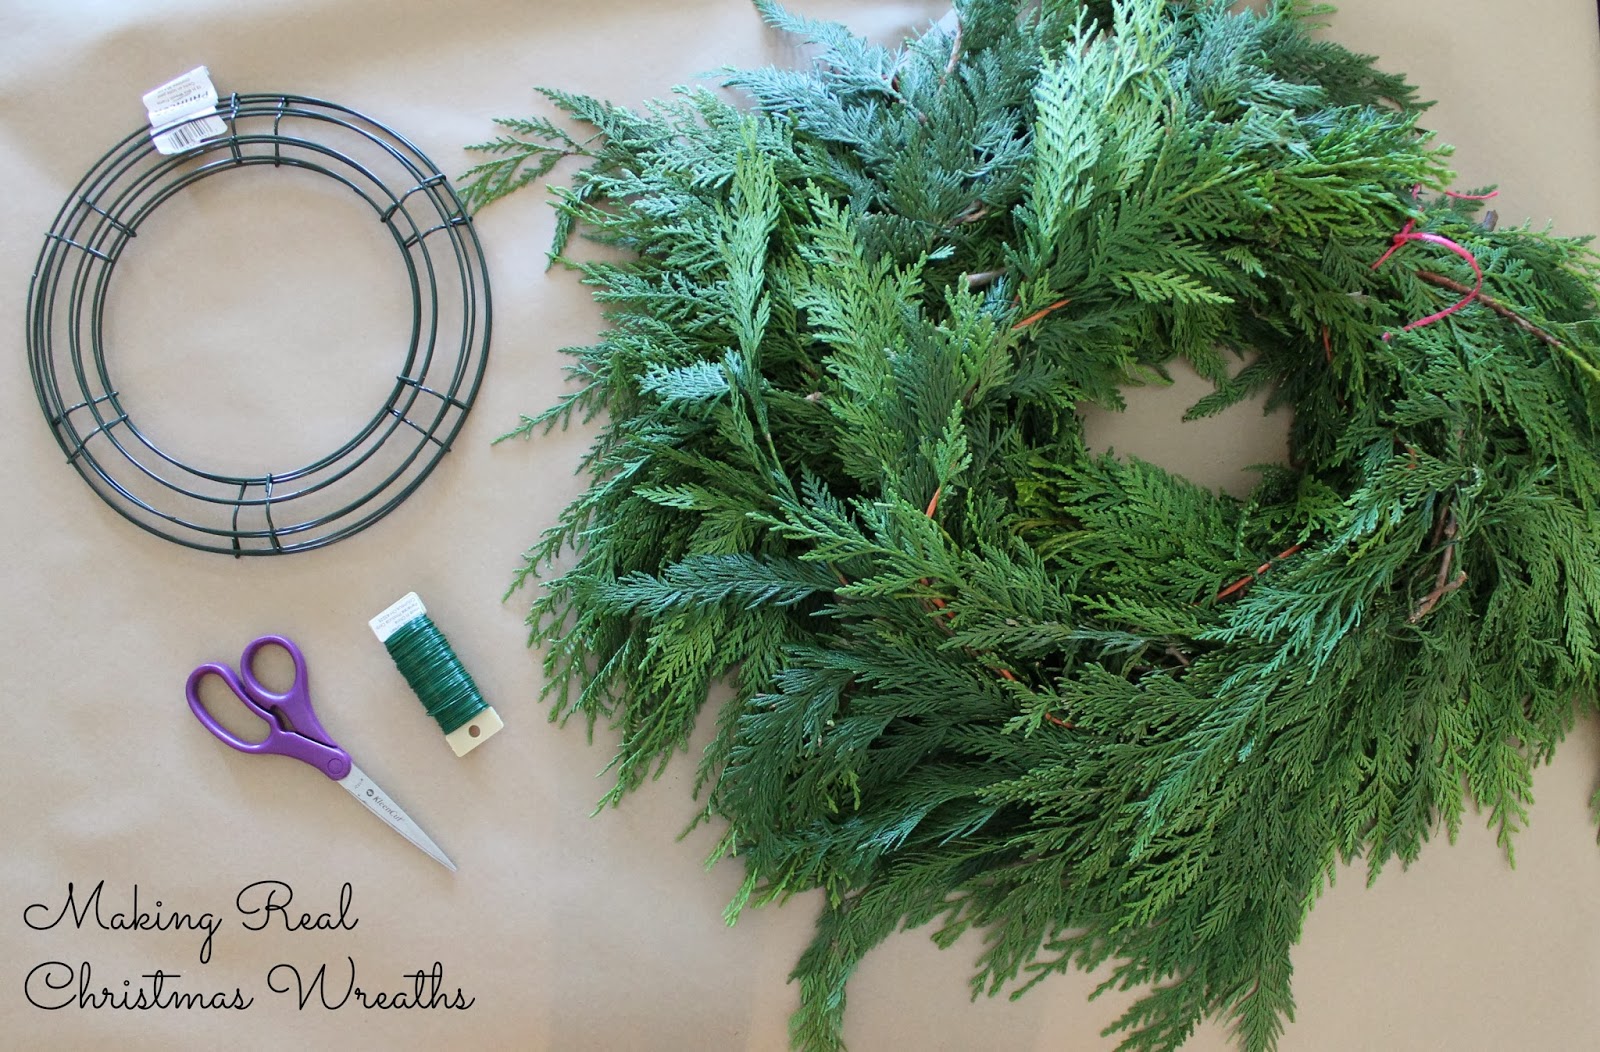
What you need:

floral wire * scissors * greenery * wreath form * accessories

Take the greenery and wire the end of it to the wire wreath. 


 Keep wrapping greenery around while wiring it to the wire form.  I found it easiest to use long strips on wire to keep the wreath looking full. 


Can you just smell the evergreen?  Next hang up your wreath and take a step back.  If you like how it looks then start accessorizing! If not, clean it up with your scissors.  


Hope this helps!  Happy Crafting!


{LJ}

Monday, December 16, 2013

Crock Pot Breakfast


Hello!  Today was a beautiful day in Colorado.  I actually got run outside in shorts {hello, white legs}!  I only have 3 more real days of work this week, and I am super pumped!  Can you believe Christmas will be here in 9 days?!  Holy moly!  If you like easy, make the night before, and yummy Christmas breakfast, this is totally for you.


I found this {recipe} on Jimmy Dean's website.  I only changed the recipe by adding a cup and a half bell peppers instead of the 1/2 cup sun dried tomatoes.  You can serve this with tortillas and salsa if you're a Mexican food addict like me. 


Thanks for stopping by and check out past Wonderfully Made Christmas Days:

Day One: Anthropologie Knock off Wreath

Day Two:  Our DIY Stockings

Day Three:  DIY Mercury Glass Ornaments

Day Four:  DIY Snow Globes

Day Five:  Hot Cocoa Mix

Day Six: Chocolate Bundt Cake


{LJ}

Thursday, December 12, 2013

Chocolate Bundt Cake


Hi y'all!  Hope you are enjoying some "warmer" weather.  We finally are above freezing!  Can I get an amen?  I am going to talk a little bit today about the most important part of Christmas, the food. I'm totally kidding, there are many more important reasons, but I really love food.  :)  Are you a classic Christmas eater?  My family has eaten beef tenderloin for Christmas as long as I can remember.  There is no way that turkey or ham is better.   When it comes to dessert I am not a big fan of pumpkin pie or fruit cake... Does anyone really eat fruitcake?  I made this chocolate cake for Thanksgiving and I just might make it again for Christmas.  I found the {recipe} from Two Peas and Their Pod.  I used Greek yogurt instead of sour cream.


If you are into rich chocolatey heaven this cake it for you. Happy Baking!

 
  Check out past Wonderfully Made Christmas days:

Day 1:  Anthropologie Knock off Wreath

Day 2:  Our DIY Stockings

Day 3:  DIY Mercury Glass Ornaments  


Day 4: DIY Snow Globes

Day 5: Hot Cocoa Mix

{LJ}

P.S.  This is wonderful with a cold glass of milk...


Tuesday, December 10, 2013

Hot Cocoa Mix {Winter Wedding Favors}


Since moving to Colorado my need for hot drinks has increased exponentially.    I started using my seat heater in September, winter coat in October, and have the fire constantly on in December.  I love hot drinks when I am feeling chilly.  This is my favorite hot cocoa mix, and I have been drinking it for over a month now.  My fabulous Aunt Shelli made this for my family back in high school {almost a decade ago...}.  Since then this has been my go to hot cocoa.  This is great for Christmas gifts for neighbors, coworkers, the mail man, or a teacher. When we set our wedding date for early February hot cocoa favors were the first thing to get checked of my wedding to do list. 


Caroline Jurgensen Photography

This was a fun project!  I got the jars at Ace Hardware.  I did my research and that is where they were the cheapest.  Here are the ingredients you will need {get a bigger Nesquik than the one that is pictured}:


I made this recipe card on picmonkey :)


When I made this for our wedding I bought much larger sizes of everything.  I used a large funnel to put these together.  Each batch makes about 8 pint sized jars filled 2/3 full. 


Hope you are staying warm!


{LJ}

Sunday, December 8, 2013

DIY Snow Globes


Are you ready for the fastest project ever?


Here's what you'll need :


{hot glue not pictured}

First glue the tree to the lid. 


Fill the jar with 1/3 cup Epsom salt, and put jar together. 


Yep, that's it.  :)  oh and...


  Check out past Wonderfully Made Christmas days:

Day 1:  Anthropologie Knock off Wreath

Day 2:  Our DIY Stockings

Day 3:  DIY Mercury Glass Ornaments 

{LJ}

Thursday, December 5, 2013

DIY Mercury Glass Ornaments


Brrrrr!  These single digit temperatures are not cool.  This Texas girl is not used to this.  I would take 105 degrees over 5 degrees any day!  Have you seen all the mercury glass and metallic Christmas decorations this year?  I love it.  I really wanted some mercury glass ornaments.  For some reason I could not find any that were what I think is reasonable {not even at Ross!}.  I don't know about you, but my Christmas decor changes every other year.  That makes it hard to spend too much on Christmas decor.  I saw a couple tutorials on pinterest and these {here and here} were the most helpful.  


 If you want to make your own Mercury Glass Ornaments you will need:


{plus a hair dryer, looking glass paint is from Hobby Lobby, ordinary spray bottle from target}

  1.  Start by spraying the inside of your ornament with looking glass spray paint.  About 3 or 4 sprays will be enough.  


2.  Twirl your ornament around getting equal coverage.  You may want to do this over a throw away box so you don't drip on the table.  :)  This should take a few seconds and then use your hair dryer to dry the paint a little bit more.  You're goal is to not let the paint pool in the ornament.  

3.  Spray the inside of the ornament once or twice with your water spray bottle. 

4.  Shake the ornament a little bit.  Your are wanting big drops of water.  One of the tutorials I read said to use the q-tips if you were not getting good spots {I ended up not using them}. 


5.  I let the paint dry for a while.  Make sure you keep the ornament upside down so the paint does not pool.  

6.  After the paint dried for a little while I dropped a couple drops of gold paint in ornament along with a little water.  Swirl this mixture around and blow dry the inside for a little bit.  Place ornaments upside down until paint dries completely.  

7.  Optional*  I spray painted the tops with oil brushed bronze so the ornaments would look a little more antiqued. 


Hope this helps if you are wanting to make some mercury glass ornaments!  


 I will have to be honest...I only like 3 out of the 4 I made.  It took a little bit of time to get everything the way I wanted.  Happy crafting!


Check out past Wonderfully Made Christmas days:

Day 1: Anthropologie Knock Off Wreath

Day 2:  Our DIY Stockings
  {LJ}
Related Posts Plugin for WordPress, Blogger...